Fixing a Leaky Keurig: Causes and Solutions for Water Leakage
Have you ever experienced water leakage from the top of your Keurig coffee maker? If so, you’re not alone. Water leaks are a common problem that many Keurig owners face. Unfortunately, this issue can not only be frustrating but can also result in wasted water, potential damage to your machine, and a less-than-pleasant coffee brewing experience.
In this blog post, we’ll delve into the causes of water leaks in Keurig machines and provide you with practical solutions to fix the problem. Additionally, we’ll share some essential maintenance tips to help you prevent recurring leaks and keep your coffee machine functioning optimally. So, read on to discover how to solve the issue of a leaky Keurig and enjoy your coffee hassle-free!
Table of Contents
Causes and Solutions for Water Leakage
Welcome to our blog post where we’ll address a common issue faced by Keurig coffee machine owners: water leakage. If you’ve noticed water leaking from the top of your Keurig machine, you’re not alone. This can be frustrating and may even hinder your enjoyment of that perfect cup of coffee. But fear not, as we have compiled some valuable insights and practical solutions for you.
The Main Culprits behind Keurig Water Leaks
Before we delve into the solutions, it’s important to understand the potential causes of a leaking Keurig machine. By identifying these culprits, you’ll be better equipped to troubleshoot the issue.
1. Faulty Seal
One of the most common causes of a water leak is a faulty seal. Over time, the rubber gasket or O-ring in your Keurig may become worn or out of place, allowing water to escape. To check if this is the case, remove the water reservoir and inspect the seal for any signs of damage or misalignment.
2. Clogged Water Line
A clogged water line can also lead to water leakage. When minerals or debris accumulate within the tubing, it disrupts the water flow, causing pressure to build up and escape from unintended areas. Regular cleaning and descaling can help prevent this issue.
3. Improper Assembly
Did you recently clean or disassemble your Keurig? If yes, it’s possible that the machine was not reassembled correctly, resulting in a water leak. Double-check all the components and ensure they are snugly in place to avoid any potential leaks.
Addressing the Leaks: Practical Solutions
Now that we’ve covered the potential causes of water leakage, let’s move on to the solutions.
1. Replacing the Seal
If you’ve identified a faulty seal, the solution is relatively simple. Visit the Keurig website or contact their customer support to order a replacement seal. Once you receive it, carefully remove the old seal, clean the area, and install the new one following the manufacturer’s instructions.
2. Cleaning and Descaling
To tackle a clogged water line, regular cleaning and descaling are crucial. Refer to your Keurig’s user manual for specific instructions on the cleaning process. Usually, it involves using a mixture of vinegar and water to descale the internal components. This will remove mineral build-up and help restore proper water flow.
3. Double-checking Assembly
If you suspect improper assembly, disassemble your Keurig and carefully reassemble it. Follow the user manual or online tutorials to guide you through the process. Pay attention to each component and ensure a snug fit. This simple step can often resolve any leaking issues.
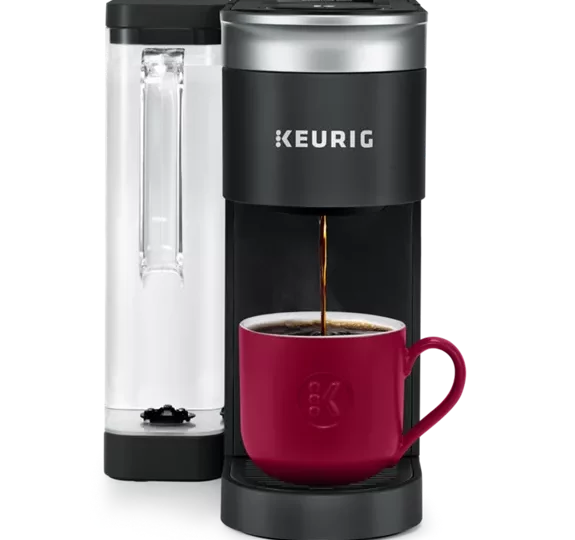
Did you know that a common cause of a leaky Keurig is an improperly seated water reservoir? If the water reservoir is not placed securely onto the base of the machine, it can lead to leaks. Make sure to firmly press the reservoir down until you hear a click or feel it settle into place.
Maintenance and Preventative Tips
Now that you’ve fixed the leak, let’s discuss some maintenance tips to keep your Keurig machine in top condition:
- Regularly clean and descale your machine, as mentioned earlier.
- Use filtered water to reduce the likelihood of mineral build-up.
- Avoid overfilling the water reservoir, as this can cause excess pressure.
- Regularly inspect the seal for signs of wear and replace it as needed.
By following these maintenance and preventative tips, you can ensure that your Keurig remains leak-free and provides you with delicious coffee for years to come.
We hope this article has helped you understand the causes of water leakage in Keurig machines and empowered you to fix the issue yourself. Remember, a small amount of troubleshooting and regular maintenance can go a long way in preserving the quality and performance of your coffee maker.
Step by Step Guide: Fixing a Leaky Keurig
Step 1: Identify the Cause of the Leak
The first step in fixing a leaky Keurig is to determine the cause of the water leakage. This will allow you to target the specific issue and find the appropriate solution. Some common causes of Keurig water leaks include:
- Worn out or damaged water reservoir
- Improper alignment of the brewer lid
- Clogged or damaged water tubing
- Excessive scale buildup
By identifying the cause, you can proceed to the appropriate solution.
Step 2: Check and Replace the Water Reservoir
If the water reservoir is worn out or damaged, it may be the source of the leak. Check for any cracks or breaks in the reservoir and replace it if necessary. Ensure that the reservoir is properly inserted into the brewer and securely in place.
Step 3: Realign the Brewer Lid
Misalignment of the brewer lid can cause water to leak from the top of the Keurig. Make sure that the lid is properly aligned and closes tightly. If the lid is damaged or not sealing correctly, consider replacing it.
Step 4: Clean or Replace Water Tubing
Clogged or damaged water tubing can also lead to water leakage. To clean the tubing, start by turning off the brewer and unplugging it. Detach the tubing and use a cleaning brush or pipe cleaner to remove any debris or blockages. If the tubing is damaged, replace it with a new one.
Step 5: Perform Regular Cleaning and Maintenance
To prevent future leaks and ensure the optimal performance of your Keurig, regular cleaning and maintenance are essential. Follow these tips:
- Descale your Keurig every three to six months to remove mineral deposits and scale buildup.
- Wipe down the exterior of the machine regularly to prevent the accumulation of dirt and grime.
- Check the seals and gaskets for any signs of wear or damage and replace if necessary.
- Use filtered or bottled water to minimize mineral buildup inside the machine.
Step 6: Contact Keurig Support
If the issue persists or you are unsure about performing any repairs yourself, it is recommended to contact Keurig Support or a professional technician. They can provide further assistance or arrange for repairs if needed.
Step 7: Enjoy Your Leak-Free Coffee!
Once you have successfully fixed the leak, you can resume enjoying your favorite coffee from your Keurig without any worries of water leakage. Sit back, relax, and savor every sip!
Wrap Up
Dealing with a leaking Keurig can be frustrating, but with proper troubleshooting and maintenance, you can easily fix the issue and enjoy your coffee hassle-free. Remember to check the water reservoir, replace worn-out gaskets, clean the brewer regularly, and descale your Keurig as needed. By following these simple steps, you can prevent water leaks and ensure your coffee machine functions optimally.
We hope this article has provided you with valuable insights into fixing a leaky Keurig and the causes and solutions for water leakage in Keurig machines. If you have any further questions or experiences to share, we would love to hear from you. Feel free to leave a comment below!
And don’t forget to explore our other coffee-related articles for more brewing tips, recommendations, and fascinating coffee content:
- How to Make Vietnamese Coffee: The Strong, Bold Coffee
- How to Hario V60: The Ultimate Guide to Making Perfect Coffee
- How to Siphon Coffee: The Slow and Elegant Way to Brew a Perfect Cup
- How to Aeropress: The Ultimate Guide to Making Amazing Coffee at Home
- And many more!
Thank you for reading and happy brewing!


