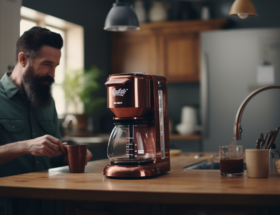
The Ultimate Guide: How to Moka Pot Coffee
Let’s settle something right now: the moka pot is not a sad consolation prize for people who can’t afford an espresso machine. That little aluminum hourglass has been bubbling away on Italian stovetops since 1933, and when you treat it right, it makes a cup so rich and chocolatey you’ll wonder why you ever paid four dollars for someone else to make you a worse one.
Here’s the thing nobody tells you: most people brew terrible moka pot coffee, and it’s almost never the pot’s fault. It’s the grind, the heat, and the panic. This guide fixes all three. By the time you’re done reading, you’ll know the exact coffee-to-water ratios for every pot size, the one water trick that kills bitterness on contact, the right way to ride the heat, and how to rescue a brew that’s heading off a cliff. No fluff, no flowcharts. Just you, your coffee maker, and a much better morning.
Table of Contents
- A Quick Word on Where the Moka Pot Came From
- How a Moka Pot Actually Works
- The Science Behind a Good (or Bad) Cup
- The Exact Coffee-to-Water Ratios (Per Pot Size)
- Getting the Grind Right (This Is the Big One)
- Step-by-Step: Brewing the Perfect Moka Pot Coffee
- Troubleshooting: Common Moka Pot Mistakes and Fixes
- How to Clean and Maintain Your Moka Pot
- Best Moka Pots Worth Buying
- A Couple of Recipes to Try
- Frequently Asked Questions
- Go Make Yourself a Better Cup
A Quick Word on Where the Moka Pot Came From
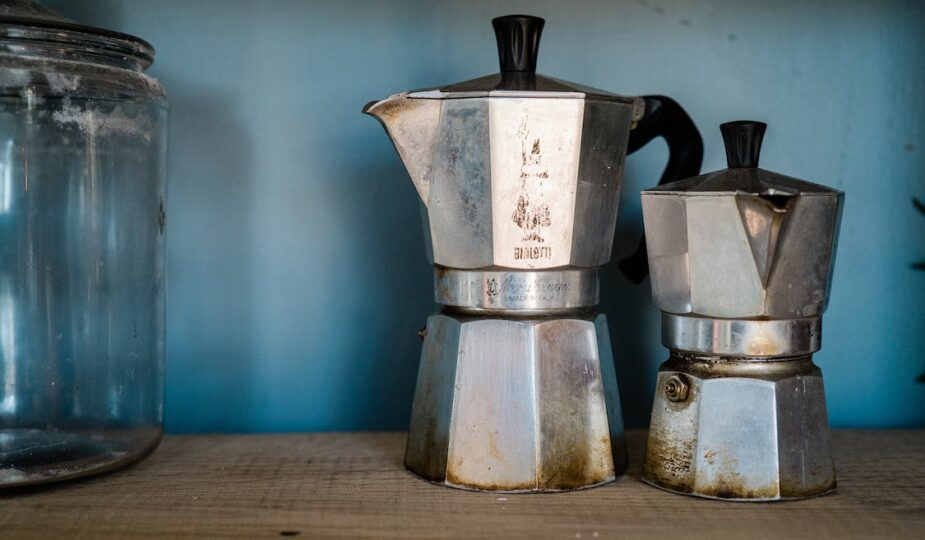
The moka pot was invented in Italy in 1933 by Alfonso Bialetti. He’d watched espresso bars take over the country and thought, reasonably, that regular people deserved that same bold coffee at home without remortgaging the house for a commercial machine. So he built one out of aluminum, shaped like a little eight-sided robot, and called it the Moka Express.
It worked. It’s still working. Bialetti has sold hundreds of millions of them, they’re still made in Italy, and that octagonal silhouette sits in the design wing of museums. Today you’ll find moka pots in aluminum (the classic, light and conductive) and stainless steel (heavier, dishwasher-friendly, and induction-compatible). One of the most beloved coffee makers on earth, and it doesn’t even need electricity. Respect.
How a Moka Pot Actually Works
Three parts, that’s the whole machine. Once you understand what each one does, nothing about brewing will mystify you again.
- The bottom chamber (boiler): You fill this with water. There’s a little safety valve on the side that tells you the maximum fill line.
- The funnel basket: This sits in the bottom chamber and holds your ground coffee.
- The top chamber: This is where your finished coffee collects, ready to pour.
Here’s the part people get wrong, so listen up: a moka pot is not powered by boiling water shooting upward. It’s powered by steam pressure. As the water at the bottom heats, the air and steam above it expand and push down on the water’s surface. That pressure forces water up through the funnel, through your coffee bed, and out the spout into the top chamber. Around 1 to 1.5 bars of pressure, which is a fraction of an espresso machine‘s 9 bars. That’s why moka coffee is intense and concentrated, but not a true espresso with crema.
The Science Behind a Good (or Bad) Cup
Moka coffee tastes bitter so often because of two villains: too much heat and too much time. When the bottom chamber gets blisteringly hot, the water comes through fast and scorching, and it basically cooks the grounds instead of brewing them. Burnt, ashy, harsh. That’s the flavor everyone blames on the moka pot when it’s really a heat problem.
The fix is gentler than you’d think, and it starts before the pot ever touches the burner. Start with hot water in the boiler (more on that in a second), keep your heat moderate, and pull the pot the moment the magic happens. Do that, and you get the good side of moka: deep, syrupy, cocoa-and-toast flavor that’s significantly stronger and more concentrated than regular drip coffee. Worth getting right.
The Exact Coffee-to-Water Ratios (Per Pot Size)
Stop guessing. The single most reliable thing you can do is fill the funnel basket level-full and fill the water to just below the safety valve. But if you want numbers, here they are:
- 3-cup pot: about 200ml water and 15–18g coffee.
- 6-cup pot: about 300–400ml water and 25–36g coffee.
- 9-cup pot: about 500–600ml water and 45–54g coffee.
One thing that trips up first-timers: a moka pot “cup” is a tiny Italian espresso-sized cup, roughly 50–60ml. A “6-cup” pot makes about a mug and a half by American standards, not six full mugs. Calibrate your expectations and you won’t be disappointed.
Getting the Grind Right (This Is the Big One)
If your coffee is bitter no matter what you do, your grind is probably too fine. The right moka grind sits between table salt and fine drip — finer than what you’d use for a regular coffee maker, but distinctly coarser than the powdery, packed grind you’d use for real espresso.
Too fine, and you choke the pot: water struggles through, pressure climbs, and you get over-extracted, harsh coffee (or a sputtering mess). Too coarse, and water rushes through weak and sour. A good burr coffee grinder set just a notch finer than your drip setting nails it. And please, fill the basket but do not tamp it down like espresso. A loose, level fill is what you want.
Step-by-Step: Brewing the Perfect Moka Pot Coffee
This is the method that turns a mediocre pot into a great one. Follow it exactly the first few times, then make it yours.
- Start with hot water. Boil your kettle and fill the bottom chamber with hot (just-off-the-boil) filtered water up to just below the safety valve. Cold water sits on the burner too long and bakes your grounds bitter before extraction even starts. This one swap fixes more bad moka coffee than anything else. Use a towel to handle the hot base.
- Fill the basket, don’t pack it. Add your freshly ground coffee to the funnel, level it off with a finger, and leave it loose. No tamping.
- Assemble and set the heat to medium-low. Screw the top on, put it on a burner that doesn’t flame up past the base, and keep the lid open so you can watch.
- Watch for the stream. In a few minutes, coffee starts flowing up into the top chamber. You want a slow, steady, honey-colored stream — not an angry, sputtering geyser. If it’s violent, your heat is too high.
- Pull it early. The second the stream turns pale, blonde, and starts to gurgle and hiss, take the pot off the heat. That gurgle is steam, not coffee, and it carries all the bitter notes you don’t want.
- Cool the base to stop extraction. Run the bottom chamber under cold tap water for a few seconds (or sit it on a damp towel). This halts brewing instantly and locks in the sweet stuff.
- Stir and pour. Give the top chamber a quick stir to even out the flavor, then pour. The first drops are the strongest, so stirring keeps every sip consistent.
Total time, start to pour, is usually 4–6 minutes once the water’s already hot. Don’t walk away — moka pots reward attention and punish neglect.
Troubleshooting: Common Moka Pot Mistakes and Fixes
Something off? Don’t toss the pot. Run down this list and you’ll almost always find the culprit.
- Coffee tastes burnt or bitter: Heat too high or grind too fine. Drop the burner to medium-low, start with hot water, and coarsen your grind a touch.
- Coffee is weak, watery, or sour: Grind too coarse, or you pulled it too early. Go a little finer and let it brew until that golden stream really gets going.
- It sputters and erupts violently: Heat is way too high. Bring it down — you want a calm, steady stream, not a fountain.
- Coffee comes out unevenly or barely at all: The basket may be overfilled or tamped, or your grind is too fine and choking the flow. Loosen up and level off.
- Grounds in your cup: Worn or missing gasket and filter plate, or grind too fine. Check those small parts. We’ve got a whole guide on preventing grounds in your coffee.
- Metallic taste: New aluminum pots need a few “seasoning” brews. Run two or three throwaway pots of cheap coffee before you trust it.
How to Clean and Maintain Your Moka Pot
Resist the urge to scrub this thing shiny. Here’s the routine that keeps it brewing well for decades:
- Let it cool, then disassemble all three parts: bottom chamber, funnel basket, top chamber.
- Rinse each part with warm water and wipe with a soft sponge. No soap on aluminum — it strips the seasoned coffee oils that make your brew taste good and can leave a soapy aftertaste. (Stainless steel is more forgiving, but warm water still does the job.)
- Pop out the rubber gasket and the metal filter plate now and then to clear trapped grounds underneath.
- Dry every part thoroughly before reassembling, and store it unscrewed so the gasket doesn’t get compressed and the inside can breathe. A stale, mildewy pot is a sad pot.
Replace the gasket every year or two (they’re cheap), and never put an aluminum moka pot in the dishwasher — it’ll oxidize and turn chalky.
Best Moka Pots Worth Buying
You don’t need anything fancy. But here’s how the popular options actually differ:
- Bialetti Moka Express (aluminum): The classic for a reason. Affordable, light, brews beautifully, and looks the part. Perfect first moka pot. Just remember: not induction-compatible.
- Bialetti Venus / Musa (stainless steel): More durable, dishwasher-friendly, and works on induction cooktops. A great pick if you’ve got an induction stove or you’re rough on your gear.
- Generic stovetop espresso makers: Budget brands will brew fine, but check the gasket quality and make sure replacement parts are available, because that’s what fails first.
Whatever you buy, match the size to how you actually drink. A 3-cup for solo mornings, a 6-cup if you’re brewing for two. An oversized pot brewed half-full doesn’t extract well.
A Couple of Recipes to Try
Once you’ve got the basic brew down, play around:
The Classic Black: Brew as above and drink it straight, or knock it back the Italian way in one small, glorious shot. This is your daily driver.
Moka Cappuccino at Home: Pull a strong moka brew, then froth some warm milk (even a jar-shake-and-microwave trick works) and pour it over. Not technically a cappuccino, but close enough to make your morning feel fancy.
Iced Moka: Brew a slightly stronger pot, pour it straight over a tall glass of ice, and add a splash of cold milk and a little sugar. Summer in a cup. Want more cold ideas? Our guide to making the best coffee at home has you covered.
Frequently Asked Questions
What is a moka pot?
A moka pot is a stovetop coffee maker invented by Alfonso Bialetti in Italy in 1933. It uses steam pressure to push hot water up through ground coffee, producing a rich, concentrated brew that’s often called stovetop espresso. It’s prized worldwide for making bold, espresso-adjacent coffee without electricity or an expensive machine.
How does a moka pot work?
Heat the water in the bottom chamber and steam pressure builds above it, pushing the water up through the coffee grounds in the funnel basket. The brewed coffee rises through the spout and collects in the top chamber, ready to pour. It runs on roughly 1 to 1.5 bars of pressure — far less than an espresso machine’s 9.
How should I grind coffee for a moka pot?
Aim for a grind between table salt and fine drip — finer than drip coffee, but coarser than espresso. Too fine chokes the pot and turns the coffee bitter; too coarse makes it weak and sour. A burr coffee grinder set just below your drip setting is ideal, and you should always start with fresh, well-chosen coffee beans.
How much coffee and water do I use?
The easy rule: fill the funnel basket level-full and the water to just below the safety valve. By weight:
- 3-cup pot: about 200ml water and 15–18g coffee.
- 6-cup pot: about 300–400ml water and 25–36g coffee.
- 9-cup pot: about 500–600ml water and 45–54g coffee.
How long does it take to brew?
About 4–6 minutes once your water is already hot, depending on pot size and heat. Pull it off the burner the moment the stream turns pale and starts to hiss — chasing extra time past that point just adds bitterness, not strength.
How do I clean a moka pot?
Cool it, disassemble all three parts, and rinse with warm water using a soft sponge. Skip soap on aluminum so you don’t strip the flavor-friendly coffee oils. Clear grounds from under the filter plate and gasket occasionally, dry everything fully, and store it unscrewed so it can air out.
Is moka pot coffee as strong as espresso?
Not quite, but it’s close. A moka pot brews at roughly 1 to 1.5 bars versus an espresso machine’s 9, so you don’t get true crema or full espresso intensity. Still, it’s far stronger and more concentrated than drip coffee — rich, bold, and deeply satisfying. If you want the real thing, see our guide to making espresso at home.
Go Make Yourself a Better Cup
Here’s the truth: the moka pot isn’t fussy, it’s just honest. Give it hot water, a sensible grind, moderate heat, and a little attention, and it’ll hand you a cup of coffee that punches way above its price tag. Get lazy with the heat or the grind, and it’ll let you know. That’s a fair deal.
So pull yours out, give it a proper brew tomorrow morning, and taste the difference for yourself. Then pour a second cup for somebody you like. For more brewing tips, grinder picks, and bean guides, the rest of Ten Coffees is right here whenever you need it. Now go make something good.