Cleaning Your Coffee Maker: A Step-by-Step Guide to Maintenance
Discover how to keep your coffee maker clean and in top shape with our comprehensive guide. In this blog post, we will walk you through the process of cleaning your coffee maker, from daily cleaning to deep cleaning. We will also provide tips to prevent common issues and discuss how a clean coffee maker can significantly enhance the quality of your brew. Whether you’re a coffee aficionado or just looking to enjoy a fresh cup of joe, taking care of your coffee equipment is essential for maintaining its lifespan and ensuring a delicious, satisfying cup every time. So let’s dive in and learn about coffee maker maintenance and cleaning tips.
Table of Contents
Cleaning Your Coffee Maker: A Step-by-Step Guide to Maintenance
Keeping your coffee maker clean is essential for maintaining its longevity and ensuring a delicious, high-quality brew every time you make coffee. Cleaning your coffee maker regularly not only removes mineral deposits and leftover coffee oils but also prevents the growth of bacteria that can affect the taste of your coffee. By following our comprehensive guide, you’ll learn the importance of coffee maker maintenance and how to clean your machine effectively.
Did you know that regular cleaning and maintenance can extend the lifespan of your coffee maker by up to 50%? Taking proper care of your coffee equipment not only ensures a great tasting brew but also saves you money in the long run. So, make sure to keep your coffee maker sparkling clean!
Regular cleaning and maintenance can significantly prolong your coffee machine’s lifespan, saving you money in the long run. Neglecting to clean your coffee maker can lead to clogs, reduced water flow, and even malfunctions. So, let’s dive into the step-by-step process of cleaning your coffee maker and ensuring its optimal performance.
The Benefits of a Clean Coffee Maker
- Enhanced Taste: Coffee residue and mineral build-up can alter the taste of your brew, making it bitter or stale. Regular cleaning restores the pure taste of your coffee.
- Improved Performance: A clean coffee maker ensures proper water flow, prevents clogs, and maintains consistent brewing temperature, resulting in better extraction and optimal flavor.
- Prevention of Mold and Bacteria: Damp coffee grounds and warm water can create a breeding ground for mold and harmful bacteria. Regular cleaning eliminates these potential health hazards.
- Extended Lifespan: By taking care of your coffee maker, you can prevent the accumulation of mineral deposits and other damage-causing factors, prolonging the lifespan of your machine.
Now that we understand why keeping a clean coffee maker is crucial, let’s move on to the step-by-step guide on how to effectively clean and maintain your coffee machine.
Cleaning Your Coffee Maker: A Step-by-Step Guide to Maintenance
Discover how to keep your coffee maker clean and in top shape with our comprehensive guide. We’ll walk you through the process of cleaning your coffee maker, from daily cleaning to deep cleaning, and provide tips to prevent common issues. Plus, learn how a clean coffee maker can significantly enhance the quality of your brew.
The Importance of Cleaning Coffee Maker: Enhancing Brew Quality
Before we dive into the cleaning process, let’s understand why it’s essential to keep your coffee maker clean. Over time, coffee oils, mineral deposits, and other residue can accumulate in your machine, affecting the taste and aroma of your coffee. Neglecting regular cleaning can result in a bitter or stale flavor.
By cleaning your coffee maker regularly, you ensure that it functions optimally, producing delicious, high-quality brews every time.
Daily Cleaning: Simple Steps for Freshness
To maintain your coffee maker’s performance, incorporate these quick and easy daily cleaning steps into your routine:
- Empty the coffee grounds and rinse the carafe after each use.
- Remove and clean the filter or filter basket.
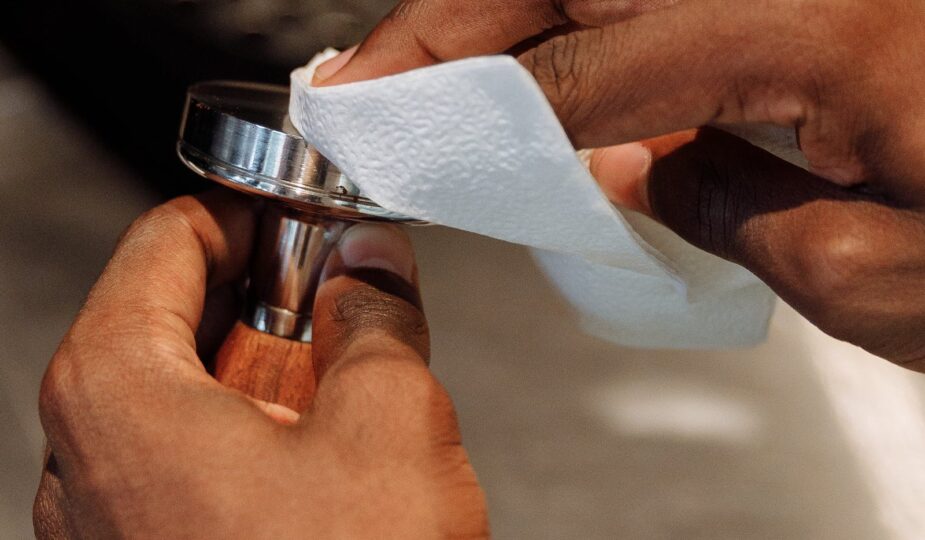
- Wipe the exterior of the machine with a damp cloth.
These simple tasks will prevent residue buildup and keep your coffee maker looking and functioning its best.
Regular Cleaning: Deepening the Cleanse
Regular deep cleaning is necessary to remove stubborn stains, mineral deposits, and coffee oils that accumulate over time. Follow these steps for a thorough cleanse:
- Prepare a solution of equal parts water and white vinegar.
- Fill the water reservoir with the vinegar solution.
- Run a full brewing cycle without coffee grounds.
- Repeat the process twice with fresh water to remove any vinegar residue.
Cleaning your coffee maker with vinegar helps dissolve mineral deposits and eliminate bacteria, resulting in improved taste and performance.
Preventing Common Issues with Proper Coffee Equipment Care
To extend your coffee machine’s lifespan and prevent malfunctions, follow these essential care tips:
- Use filtered water to prevent mineral buildup.
- Regularly replace and clean the water filter if your coffee maker has one.
- Refer to your coffee maker’s manual for specific care instructions.
By incorporating these practices into your coffee maker maintenance routine, you can enjoy delicious coffee brews for years to come.
Step-by-Step Guide to Cleaning Your Coffee Maker
Step 1: Daily Cleaning
Start by cleaning the external parts of your coffee maker on a daily basis. Wipe down the exterior with a damp cloth to remove any spills or stains. Pay attention to the area around the coffee pot and the control panel, as these tend to accumulate the most dirt and grime.
Tip: Use a mild detergent or soap to get rid of stubborn stains on the external surfaces. Avoid using abrasive cleaners that can damage the finish.
Step 2: Cleaning the Coffee Pot and Filter Basket
Remove the coffee pot and filter basket from the machine. Discard any remaining coffee grounds and rinse both parts with warm soapy water. Use a sponge or brush to scrub away any residue, then rinse thoroughly to remove any soap residue.
Tip: For tough stains or mineral buildup, soak the parts in a solution of equal parts vinegar and water for about 15 minutes before scrubbing. Rinse well afterwards.
Step 3: Descaling Your Coffee Maker
Mineral deposits from water can build up in your coffee maker over time, affecting the taste of your brew. Descaling is an important step to remove these deposits and keep your machine functioning optimally.
- Prepare a solution by mixing equal parts of white vinegar and water.
- Pour the solution into the water reservoir and start a brew cycle without coffee grounds.
- Halfway through the brew cycle, turn off the coffee maker and let the solution sit for about 30 minutes.
- After the waiting period, resume the brew cycle to complete the process.
- Run several cycles of plain water to rinse out any remaining vinegar taste.
Tip: If you don’t like the smell of vinegar, you can also use a descaling solution specifically designed for coffee makers, following the manufacturer’s instructions.
Step 4: Cleaning the Internal Components
Over time, coffee oils and residue can build up inside the coffee maker, affecting the taste and performance of the machine. It’s important to clean these internal components periodically.
- Refer to your coffee maker’s manual to locate the removable parts. Typically, it includes the water reservoir lid, filter holder, and showerhead.
- Remove these parts and soak them in warm soapy water for a few minutes.
- Using a soft brush, scrub away any residue or buildup, paying attention to hard-to-reach areas.
- Rinse the parts thoroughly and let them air dry before reassembling.
Tip: If your coffee maker has a self-cleaning function, follow the manufacturer’s instructions for an automated deep cleaning process.
Step 5: Regular Maintenance and Prevention
Keeping your coffee maker clean extends its lifespan and ensures a consistently delicious brew. Here are a few additional maintenance tips:
- Regularly change the water filter, if your coffee maker has one, as instructed by the manufacturer.
- Replace the coffee pot if it becomes cracked or damaged to avoid accidents.
- Descale your coffee maker every 1-3 months, depending on the hardness of your water.
- Consider using filtered or distilled water to reduce mineral buildup.
Tip: Optimal coffee maker performance and durability can be achieved by following the manufacturer’s instructions specific to your machine model.
By following these steps and implementing regular cleaning and maintenance, you can ensure that your coffee maker stays in top shape and continue enjoying the perfect cup of coffee every morning!
Wrap Up
Keeping your coffee maker clean is essential for maintaining its quality and ensuring the longevity of the machine. By following the step-by-step guide to maintenance outlined above, you can easily clean your coffee maker and prevent common issues. Remember to clean your coffee maker daily, deep clean regularly, descale periodically, and replace any worn-out parts.
A well-maintained coffee maker not only prolongs its lifespan but also enhances the quality of your brew. By removing any buildup or residue, you can enjoy a consistently delicious cup of coffee every time you brew. Additionally, regular cleaning and maintenance can prevent clogs, strange tastes, and other issues that may arise from neglecting your coffee maker’s care.
We hope this comprehensive guide has provided you with valuable insights and practical tips for cleaning and maintaining your coffee maker. If you have any questions or additional cleaning tips to share, please leave a comment below. We’d love to hear from you!
Related Articles:
- How to Make Vietnamese Coffee: The Strong & Bold Coffee
- How to Hario V60: The Ultimate Guide to Making Perfect Coffee
- How to Make Cuban Coffee: Café Cubano
- How to Aeropress: The Ultimate Guide to Making Amazing Coffee at Home
- How to Make Cold Brew Coffee: The Easy Way
Discover more coffee-related articles and brewing guides on our website, TenCoffees.com. Happy brewing!


