Latte Art: Tips and Techniques for Beautiful Coffee Designs
Let’s settle something right now: that gorgeous rosetta on top of your latte is not magic, and it is not reserved for the tattooed barista at the cafe who never smiles at you. It’s milk, espresso, a steady hand, and about forty cups of practice. That’s it. If you can whisk eggs without losing your mind, you can pour a heart. This guide walks you through every piece of it — the microfoam that actually makes or breaks the whole thing, the exact temperatures, the pour heights, the designs in the order you should learn them, and the dumb little mistakes that are quietly sabotaging you. By the end you’ll know precisely what to fix and why. Grab your pitcher.
What Latte Art Actually Is (And Why Yours Isn’t Working Yet)
Latte art is the pattern that appears when you pour steamed milk into espresso. The white you see is microfoam — milk shot through with air so fine it looks like wet paint — floating on top of the dark crema. The contrast between the two is the whole show. No crema, no contrast. Foam that’s too stiff and dry, no flow. So if your “art” keeps coming out as a sad beige blob, I promise you the problem started long before you tilted the pitcher. Nine times out of ten it’s the milk. We’ll fix the milk first, because everything else is downstream of it.
Quick history while your machine warms up: this style of free-pour took off in Italy in the 1980s and got refined into the rosetta-and-heart vocabulary we use today largely thanks to Seattle’s David Schomer in the ’90s. You’re not learning a party trick — you’re learning a craft with actual lineage. Wear that lightly, but know it.
The Tools You Genuinely Need
You don’t need a cafe’s worth of gear. You need a few things that do their jobs well:
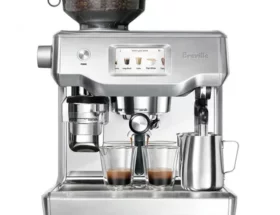
- An espresso machine with a real steam wand. This is the non-negotiable one. Pressurized steam is what creates microfoam; a handheld battery frother makes bubbly bath foam, not paintable milk. If you’re shopping, our Breville Barista Touch review breaks down a beginner-friendly option.
- A stainless steel milk pitcher with a sharp, pointed spout. The spout is your paintbrush. A 12 oz (350 ml) pitcher is the sweet spot for one or two drinks. Steel because you’ll judge temperature by feel through the metal.
- A thermometer — clip-on or infrared — until your hands learn the temperature on their own. They will.
- Fresh espresso beans. Beans roasted within the last three to four weeks pull a thick, stable crema. Stale beans give you a thin, pale surface with nothing to pour onto.
- A wide, shallow cup. A 6–8 oz cappuccino cup with sloped sides gives the milk room to spread. A tall narrow mug fights you the whole way.
That’s the kit. Notice what’s not on it: a toothpick. We’ll talk about why etching is training wheels in a minute.
Step One: Steam Microfoam That Actually Pours
This is the part everyone wants to skip and the part that decides everything. Good microfoam looks like glossy wet paint, swirls like it, and has zero visible bubbles. If you can see individual bubbles, you’ve made foam, not microfoam, and foam does not pour into patterns. Here’s how to get it right, every time.
The Milk Itself
Start with cold milk, straight from the fridge. Cold milk gives you a wider window to work before it overheats. Whole milk is the easiest to learn on — the fat and protein make a forgiving, stable foam. Want plant milk? Reach for a barista edition oat milk; the added protein and stabilizers steam far more like dairy than the regular carton, which tends to split and go watery. Fill the pitcher only to just below the bottom of the spout — roughly one-third full. Milk nearly doubles in volume, and an overfilled pitcher overflows mid-pour.
The Two Phases: Stretch, Then Texture
Good steaming is two distinct phases, and rushing the handoff between them is the classic rookie error.
- Purge the wand first. Blip the steam for a second to clear condensation before it touches the milk.
- Stretch (add air). Place the wand tip just barely below the surface and open the steam fully. You want a gentle, steady tsk-tsk-tsk paper-tearing sound — that’s air folding in. Loud screeching means the tip is too high and you’re blasting in big bubbles. Do this only until the milk warms to about body temperature, 95–100°F (35–38°C) — the pitcher still feels cool-ish on your palm. This phase is short. A handful of seconds.
- Texture (the whirlpool). Now drop the pitcher slightly so the tip sits deeper and off-center. The milk should start spinning in a tight whirlpool. No more new air — this phase folds the foam you already made into the rest of the milk, tearing big bubbles into tiny ones and creating that glossy sheen. Keep the whirlpool going.
- Cut it off at the right temp. Stop steaming at 140–150°F (60–65°C) — the point where the pitcher is just too hot to hold comfortably for more than a second or two. Past 160°F you scald the milk, kill the sweetness, and the foam collapses. Don’t argue with me on this one; hot is not the goal, silky is.
Off the wand: wipe it and purge it immediately (your future self thanks you), then swirl the pitcher hard and tap it firmly on the counter a couple of times. Swirling keeps the foam and liquid married into one glossy mass; tapping pops any stray surface bubbles. Keep swirling right up until you pour. Milk that sits separates — you’ve got maybe 30 seconds before it does.
The microfoam test: tilt the pitcher and look at the surface. If it shines like wet paint and folds in slow ribbons, you nailed it. If it looks like dish suds or has a dry stiff skin on top, dump it and steam again. Pouring bad milk is the #1 reason beginners get frustrated — you literally cannot save it at the pour.
Step Two: Pull a Shot Worth Pouring On
Your canvas is the crema. A good double shot — roughly 18 g of fresh grounds yielding about 36 g of espresso in 25–30 seconds — gives you a thick, hazelnut-colored crema that the white milk can sit on top of and cut through. If your espresso comes out pale and thin or gushes out in ten seconds, the milk has nothing to grab and your design will sink and blur. Pull the shot directly into your warm cup and pour the milk within a few seconds, while the crema is fresh and the surfaces are close in temperature. For more on the espresso side of things, our ultimate guide to making lattes at home covers dialing in your shot.

Step Three: The Pour — Designs in the Order You Should Learn Them
Every free-poured design follows the same two-move logic: pour high and thin to “fill” the cup without disturbing the crema, then drop low and pour fast to “set” the white pattern on the surface. Learn that rhythm and the designs are just variations. Learn them in this order — each one builds on the last.
1. The Heart (start here, always)
- Tilt the cup toward you at about 20 degrees.
- Pour a thin stream from a few inches up into the center, swirling the espresso. Keep the cup filling until it’s about two-thirds full — you should see the crema mix but stay brown on top.
- Drop the spout close to the surface and pour faster. A white circle blooms. Let it grow.
- To finish, lift the pitcher slightly and cut a thin stream straight up through the middle of the circle toward the far rim. That stroke pulls the circle into a heart.
2. The Tulip (stacked hearts)
A tulip is just hearts pushed into each other. Pour a small blob low, stop the pour, nudge the pitcher back an inch, and pour a second blob that pushes the first forward. Repeat for three to five stacked layers, then cut through all of them with one finishing stroke. The pause is the whole trick — stop, place, push, repeat.
3. The Rosetta (the leaf everyone wants)
- Fill the cup high and thin to two-thirds, same as always.
- Drop low at the far side of the cup and start wiggling the pitcher side to side in small, steady strokes. Those wiggles throw out the leaf “fronds.”
- As the leaves stack up, slowly draw the pitcher back toward yourself, still wiggling, walking the pattern across the cup.
- When you reach the near rim, stop wiggling, lift slightly, and cut one clean line straight through the center to the far side. That line is the stem and pulls the fronds into a leaf.
A Word on Etching
Yes, you can drag a toothpick or skewer through the surface to make swans, flowers, and signatures — and for a kid’s hot chocolate or a beginner morning, go for it. But etching is decorating, not pouring, and it leans on a separate skill. Learn the free-pour first. Etched designs sink and muddy fast, while a free-poured heart holds its crisp edge to the last sip. Earn the rosetta and you’ll rarely reach for the toothpick.
Common Mistakes (Do This, Not That)
- Design sinks and disappears. You poured too high at the finish, or your foam was too thin. Get the spout right down to the surface to set the pattern.
- Big ugly bubbles on top. You stretched too long or held the wand too shallow. Less air, longer whirlpool, and tap the pitcher before pouring.
- White streaks but no shape. You started the white pour too early. Fill more of the cup brown and high before you drop down to set the design.
- Everything’s beige, no contrast. Stale beans, weak crema, or you stirred the milk in instead of floating it. Fresh beans, fresh shot, pour fast at the end.
- Milk separates before you pour. You let it sit. Swirl continuously and pour within 10–15 seconds of steaming.
How to Actually Get Better
- Practice the steam, not just the pour. Most failed pours are failed milk. Steam ten pitchers in a row and chase that wet-paint sheen.
- Practice pours with water and a drop of dish soap if you don’t want to burn through milk and espresso — it foams enough to rehearse the motion cheaply.
- Photograph every attempt. You’ll see your hearts getting rounder week over week, which is the encouragement that keeps you going.
- Watch slow-motion pours from pros and mirror the pitcher height and wiggle speed. Steal shamelessly.
Frequently Asked Questions
Can I do latte art without an espresso machine?
Honestly, not real free-pour. You need a pressurized steam wand to make true microfoam and a true espresso shot to make crema. A French press or handheld frother can whip milk into a frothy topping, and you can spoon or etch a rough design, but it won’t pour into a clean rosetta. If latte art is your goal, a machine with a proper steam wand is the entry ticket — see our Breville Barista Touch review for a beginner-friendly pick.
What’s the best milk for latte art?
Whole dairy milk is the most forgiving to learn on, thanks to its fat and protein. Among plant milks, barista-edition oat milk performs closest to dairy because it’s formulated with extra protein and stabilizers. Skim milk makes stiff, dry foam that’s harder to pour, and regular (non-barista) nut milks tend to split. Start with whole milk, get your technique down, then experiment.
What temperature should steamed milk be?
Aim for 140–150°F (60–65°C). That’s the range where milk tastes sweetest and the foam stays glossy and pourable. Above about 160°F the milk scalds, loses sweetness, and the microfoam breaks down. By feel, stop when the pitcher is just too hot to hold comfortably.
Why does my latte art disappear or sink into the coffee?
Two usual suspects. Either your microfoam was too thin and watery to float on the crema, or you poured from too high when setting the design so the white sank instead of resting on the surface. Fix the foam first (glossy, wet-paint texture), then bring the spout right down to the surface for the final, faster pour that sets the pattern.
How long does it take to learn latte art?
Most people pour a recognizable heart within a week or two of daily practice once their milk steaming is solid. A clean rosetta usually takes a few weeks to a couple of months. The variable isn’t talent — it’s reps. Consistent milk plus consistent practice gets you there faster than any single secret tip.
Wrap Up
Here’s the truth nobody tells beginners: latte art is 80% milk and 20% wrist. Nail glossy, wet-paint microfoam at the right temperature, pull a fresh shot with real crema, and the pour is almost the easy part. Start with the heart, graduate to the tulip and rosetta, skip the toothpick, and photograph your way to a steadier hand. You will pour a lot of blobs before you pour a leaf — everybody does, including the unsmiling barista — and then one ordinary Tuesday morning a perfect little heart will bloom in your cup and you’ll grin like a fool. Now go froth some milk and make somebody a cup worth showing off.
And if you’re looking for more coffee-related content, check out some of our other blog posts:
- How to Vietnamese Coffee: The Strong & Bold Coffee
- How to Hario V60: The Ultimate Guide to Making Perfect Coffee
- How to Siphon Coffee: The Slow and Elegant Way to Brew a Perfect Cup
- How to Aeropress: The Ultimate Guide to Making Amazing Coffee at Home