How to Make the Perfect Pour Over Coffee at Home
You’ve got good beans, a kettle, and high hopes. Then your pour over comes out thin and sour, or muddy and bitter, and you start wondering if the cafe down the street is secretly doing witchcraft. They are not. They’re just controlling four things you can control too: grind, water temperature, ratio, and how you pour. Nail those and you get a clean, sweet, almost tea-like cup that tastes like the coffee actually wanted to be there.
This is the only pour over guide you’ll need. You’ll get the exact gear, the precise ratio and temperature, a timed step-by-step you can follow on your first try, the mistakes that quietly wreck most cups, and a troubleshooting cheat sheet so you can taste a bad brew and know exactly what to fix. No fluff, no flowchart. Let’s make you good at this.
Table of Contents
- A Quick History of Pour Over Coffee
- Essential Equipment for Pour Over Coffee
- The Science: Why Pour Over Tastes the Way It Does
- The Numbers: Ratio, Temperature, and Grind
- Step-by-Step: How to Make Pour Over Coffee
- Tips and Tricks for a Better Cup
- Common Mistakes to Avoid
- Troubleshooting: Taste Your Coffee and Fix It
- Creative Ways to Upgrade Your Pour Over
- Frequently Asked Questions
- Now Go Brew One
A Quick History of Pour Over Coffee
The method we’re all obsessed with started with a frustrated German housewife. In 1908, Melitta Bentz of Dresden was sick of grounds and bitterness in her cup, so she punched holes in a brass pot, laid a sheet of her son’s blotting paper over them, and invented the paper coffee filter. That Melitta filter is the great-grandparent of every coffee maker dripper you’ve ever used.
Fast forward a century. Japanese precision turned that humble filter into a craft, and devices like the Hario V60 and the Chemex made pour over the darling of third-wave coffee shops. By the 2010s it had become the go-to home method for anyone who wanted control and clarity in the cup. The tools got fancier; the principle never changed. Hot water, ground coffee, gravity, and you paying attention.
Essential Equipment for Pour Over Coffee
Here’s the honest gear list. You don’t need a lab. You need these, and you need them to be decent.
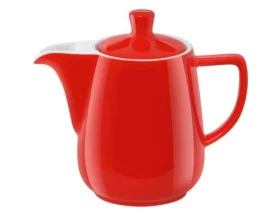
- A pour over dripper. A Hario V60, Kalita Wave, Chemex, or a basic cone all work. Cone-shaped drippers (V60) give a faster, brighter cup; flat-bottom ones (Kalita) are more forgiving for beginners.
- Paper filters sized for your dripper. The right shape matters, a V60 filter does not fit a Kalita. Paper strips out oils and fines for a clean cup. See more brewing equipment if you want to nerd out.
- A burr grinder. This is the one upgrade that changes everything. A burr grinder produces even particles; a cheap blade grinder makes coffee dust and boulders in the same batch, and that’s the number one cause of a bad pour over.
- A gooseneck kettle. The thin curved spout lets you pour slowly and exactly where you want. A regular kettle dumps water too fast and channels right through the bed.
- A digital scale. Eyeballing scoops is how you get a different (usually worse) cup every morning. Weigh the coffee and the water. This is non-negotiable.
- Fresh, whole-bean coffee. Ideally roasted within the last two to four weeks. Grind right before you brew.
Buy beans you’d actually want to drink black, because pour over hides nothing. If you want help picking, here’s how to go about selecting the perfect coffee beans, and to keep them tasting fresh, learn how to store coffee beans for longevity and freshness.
The Science: Why Pour Over Tastes the Way It Does
Brewing is just controlled extraction. Hot water dissolves compounds out of the grounds in a predictable order: the bright, fruity, acidic stuff comes out first, then the sweetness and body, and finally the harsh, dry, bitter compounds last. Your whole job is to stop pulling flavor at the sweet spot.
Three levers move that extraction:
- Grind size controls surface area. Finer grind = more surface = faster, stronger extraction. Too fine and water can’t drain, so it over-extracts into bitterness.
- Water temperature controls speed. Hotter water extracts faster. Too cool and you get sour, under-developed coffee.
- Contact time controls how much you pull. Too short = sour and weak; too long = bitter and harsh.
Under-extracted coffee tastes sour and sharp. Over-extracted coffee tastes bitter and dry. A dialed-in cup lands in the middle: sweet, balanced, clean. Keep those two failure flavors in your head, because the whole troubleshooting section below is just nudging these three levers. And if your cup keeps coming out gritty, the fix usually lives in preventing grounds in your coffee.
The Numbers: Ratio, Temperature, and Grind
Memorize these and you’re 90% of the way there.
- Ratio: 1:16 to 1:17 coffee to water by weight. Start at 1:16. For a single mug, that’s about 22 g coffee to 350 g water. For two cups, 30 g to 500 g.
- Water temperature: 195–205°F (90–96°C). Lighter roasts like the hotter end; darker roasts do better around 195°F. No thermometer? Boil, then let the kettle sit off the heat for about 30–45 seconds.
- Grind size: medium, like coarse sea salt or table sugar. Coarser than espresso, finer than French press.
- Total brew time: 2:30 to 3:30 for a single cup, including a 30–45 second bloom.
Notice the grind is the variable you’ll actually adjust day to day. Beans, roast level, and humidity all shift things, so treat these as your starting line, not gospel.
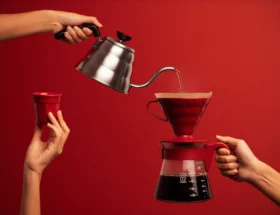
Step-by-Step: How to Make Pour Over Coffee
Here’s the full play. Put your dripper on top of your mug or carafe, the carafe on the scale, and follow along. We’ll use 22 g coffee to 350 g water for one big cup.
- Heat your water to 200°F (or boil and wait 30 seconds).
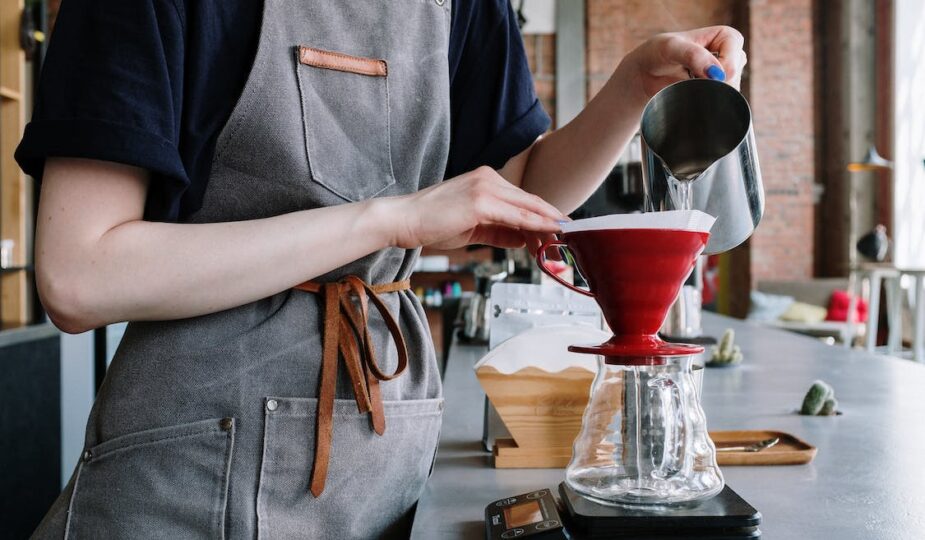
- Rinse the filter. Fold the seam, set the paper in the dripper, and pour hot water all the way through it. This washes out the papery taste and warms everything up. Dump that rinse water out of your mug. Don’t skip this, papery coffee is a self-inflicted wound.
- Grind and add coffee. Grind 22 g to a medium grind, add it to the filter, and give it a gentle shake so the bed is level. Zero out your scale.
- Bloom. Start a timer and pour just enough water to soak all the grounds, roughly twice the coffee’s weight, so about 45 g. The bed will puff up and bubble as fresh coffee releases CO2. Let it sit 30–45 seconds. A big, lively bloom means fresh beans; a flat one means they’re stale.
- First main pour. Pour in slow, steady spirals from the center outward, then back to the center. Bring your total up to about 200 g, then pause.
- Finish pouring. When the water level drops to about halfway, pour again in the same spiral motion until you hit your full 350 g. Keep the water off the very edge of the filter so coffee doesn’t run down the side unbrewed.
- Let it draw down. The whole brew should finish dripping by around 3:00. You want a flat, even bed of grounds at the end, not a deep crater on one side.
- Swirl, serve, taste. Give the carafe a gentle swirl, pour, and actually taste it before you doctor it. Then adjust tomorrow’s grind based on what you got.
Want this skill to spill over into every method in your kitchen? It’s the same logic behind making the best coffee at home.
Tips and Tricks for a Better Cup
- Weigh everything. Coffee in, water in. Consistency is the entire game.
- Grind fresh, every time. Pre-ground coffee goes flat fast. Whole beans ground at brew time keep the aromatics where they belong, in your cup.
- Pour from low and slow. A high, aggressive stream digs holes in the bed and causes channeling, where water races through gaps and skips the coffee.
- Keep your pours gentle in the center. Avoid blasting the filter edges. Spiral inward and outward, not side to side.
- Adjust grind, not ratio, to fix taste. Most problems are a grind problem in disguise.
- Use good water. Filtered water tastes better and protects your gear. Distilled water actually makes flat coffee; some minerals help extraction.
- Clean your kit. Old coffee oils go rancid and taint everything. Rinse after every brew and deep clean regularly, here’s how to clean a coffee maker properly.
Common Mistakes to Avoid
- Skipping the bloom. No bloom means trapped CO2 pushes water around the grounds instead of through them. Uneven, weak cup.
- Boiling water poured straight in. 212°F scorches the grounds and adds bitterness. Let it cool to 195–205°F.
- Pouring too fast. Speed equals channeling equals weak, sour coffee. Slow down.
- Using a blade grinder. Uneven particles extract unevenly, so you get sour and bitter in the same sip. Get a burr grinder.
- Eyeballing instead of weighing. The fastest way to a different bad cup every day.
- Stale beans or a skipped filter rinse. Two tiny shortcuts that flatten an otherwise great brew.
Troubleshooting: Taste Your Coffee and Fix It
Pour over gives you instant feedback. Taste, diagnose, adjust one thing, brew again tomorrow.
- Weak or watery? Use more coffee or grind a little finer. Also check that your brew isn’t finishing too fast (under 2:30).
- Sour or sharp? That’s under-extraction. Grind finer, use hotter water, or pour more slowly to extend contact time.
- Bitter and dry? That’s over-extraction. Grind coarser, drop the water temperature slightly, or speed up your pour.
- Tastes flat or papery? Rinse your filter next time and check your water; distilled or heavily softened water deadens flavor.
- Draining too slow (over 4 minutes)? Your grind is too fine, or you poured too fast and clogged the bed. Go coarser.
- Draining too fast (under 2 minutes)? Grind finer and slow your pour.
Creative Ways to Upgrade Your Pour Over
Once you’ve got the basics locked, play. This is where it gets fun.
- Switch up your beans. Try a bright Ethiopian for florals and citrus, then a Colombian for caramel and balance. Same method, wildly different cups.
- Experiment with grind. Go a notch finer for more body, a notch coarser for more delicacy. Small moves, big differences.
- Refine your pour. Try more, smaller pulse pours for a sweeter, more even extraction.
- Add a gentle flavor. A tiny pinch of cinnamon in the grounds or a drop of vanilla in the cup. Keep it subtle so the coffee still leads.
- Make it iced. Brew directly over ice (use about 40% of your water as ice in the carafe and brew with the rest hot) for a bright, crisp iced pour over.
Frequently Asked Questions
Still have questions about making the perfect pour over coffee at home? Here are the ones people ask most.
1. What Equipment Do I Need for Pour Over Coffee?
The essentials are a pour over dripper, paper filters that fit it, a burr grinder, a gooseneck kettle, a digital scale, and fresh whole-bean coffee beans. If you only upgrade one thing, make it the grinder, even particle size is what separates a great pour over from a mediocre one.
2. How Do I Choose the Right Coffee Beans?
Buy fresh, whole-bean coffee roasted within the last few weeks, and grind it right before brewing. Pour over especially loves brighter, more aromatic single-origin coffees like Ethiopian and Kenyan, where you’ll taste the fruit and floral notes clearly. Experiment with roasts and origins to find your favorite, and learn what to look for when selecting your beans.
3. How Much Coffee and Water Do I Use?
Start with a 1:16 ratio, meaning 1 gram of coffee for every 16 grams of water. That’s about 22 g coffee to 350 g water for a single large cup, or 30 g to 500 g for two cups. Weigh it on a scale and tweak toward 1:17 if you prefer it lighter.
4. What’s the Best Water Temperature for Pour Over Coffee?
Aim for 195–205°F (90–96°C). Use the hotter end for light roasts and the cooler end for dark roasts. No thermometer? Boil your water, then let it rest off the heat for about 30 seconds before pouring.
5. How Do I Pour the Water?
Start with the bloom: pour just enough to wet all the grounds (about twice the coffee’s weight) and wait 30–45 seconds. Then pour slowly in steady spirals from the center outward and back, keeping the stream off the filter’s edge. Slow, gentle pours give you an even bed and a clean, uniform extraction.
6. How Long Should the Brew Time Be?
Total brew time should land between 2:30 and 3:30, including the bloom. Finishing much faster usually means your grind is too coarse, so go finer; taking much longer means it’s too fine, so go coarser. The grind is your main dial.
Now Go Brew One
Here’s the whole thing in one breath: grind fresh and even, get your water to 200°F, hit a 1:16 ratio, bloom for 30 seconds, and pour slow. Taste what you made, nudge the grind tomorrow, and within a week you’ll be pulling cups that embarrass the cafe down the street.
Pour over rewards attention more than money. You don’t need the priciest gear, you need to weigh things and pay attention for three minutes. Brew yourself a cup this weekend, then go make one for someone who’s had a rough week. That’s the whole point.