Key Factors that Define a Good Espresso
Here’s the thing nobody tells you about espresso: the machine is the easy part. You can drop two grand on a gleaming chrome rig and still pull a shot that tastes like burnt regret. What actually defines a good espresso isn’t the gear in your kitchen, it’s a handful of variables you control on every single shot, and once you understand them, you’ll never be at the mercy of a sad, sour pull again.
This guide breaks down exactly what separates a great espresso from a forgettable one: the beans, the dose, the grind, the ratio, the water temperature, the pressure, the time, and the tell-tale signs in the cup. You’ll get real numbers to dial in, a step-by-step you can follow tomorrow morning, the mistakes that quietly ruin most home shots, and a quick FAQ for the questions that keep coming up. Let’s get into it.
Table of Contents
What Makes a Good Espresso? The 7 Factors That Actually Matter
A good espresso is small, intense, and balanced: a syrupy shot with a thick golden crema, a sweetness that holds its own against the bitterness, and enough body to coat your tongue. Getting there isn’t luck. It comes down to seven levers, and they all talk to each other. Change one and you’ll usually need to nudge another. Here’s what each one does.
1. Quality and Freshness of the Espresso Beans
You cannot out-brew bad beans. Full stop. The single biggest jump in quality most people can make is buying fresh, and I mean genuinely fresh, not “best by next March” fresh.
- Look for a roast date, not a best-by date. Espresso is at its best roughly 7 to 21 days after roasting. Beans rest for the first week so the carbon dioxide can settle (too much gas makes the shot gush and taste sour), then they hit their sweet spot before slowly fading.
- Buy whole beans, always. Pre-ground coffee starts losing its aromatics within minutes. Grinding right before you brew is the cheapest upgrade in coffee. Don’t argue with me on this one.
- Mind the roast level. Medium and medium-dark roasts are the friendliest for espresso, with the caramel sweetness and body the format loves. Lighter roasts can be spectacular but they’re fussy and want a finer grind and hotter water.
Once you’ve got good beans, treat them right. Air, light, heat, and moisture are the enemies, so keep them in an airtight container away from the windowsill. We go deep on this in our guide to how to properly store coffee beans, and it’s worth the five-minute read. For picking the beans in the first place, our breakdown of selecting the perfect coffee beans covers the factors that matter most.
2. The Dose (How Much Coffee You Use)
The dose is the weight of dry coffee grounds in your portafilter, and yes, you should weigh it. Eyeballing it is how shots become inconsistent.
- A single shot typically uses 7 to 9 grams.
- A double shot, which is what most people actually drink and what most modern baskets are built for, uses 16 to 20 grams, with 18 grams being a rock-solid starting point.
Match your dose to your basket size. Cramming 20 grams into a basket built for 14 chokes the shot; under-dosing leaves headroom that ruins extraction. A cheap digital scale that reads to 0.1 grams is the best ten bucks you’ll spend on this hobby.
3. Grind Size and Consistency
Grind is the dial you’ll touch most often, and it’s the one that makes or breaks the shot. Espresso needs a fine, even grind, somewhere around the texture of table salt or powdered sugar, fine enough to resist the water and build pressure.
- Too coarse? Water races through, you get a fast, thin, sour shot. That’s under-extraction.
- Too fine? Water struggles through, you get a slow, bitter, harsh shot. That’s over-extraction.
Consistency matters as much as fineness, which is exactly why a quality burr grinder beats a blade grinder every time. Blades chop unevenly and the fines over-extract while the boulders under-extract, all in the same shot. If you’re shopping, start with our best coffee grinder guide and our advice on selecting the perfect coffee grinder for your brewing method. Grind is the variable you’ll adjust to hit your target time, so being able to make small, repeatable changes is everything.
4. The Brew Ratio
The brew ratio is the relationship between dry coffee in and liquid espresso out. It’s the recipe that decides whether your shot is intense and punchy or stretched and watery. The standard, and a fantastic place to start, is 1:2.
- 1:2 (a “normale”): 18 g of coffee yields about 36 g of espresso. Balanced, classic, the default for a reason.
- 1:1 to 1:1.5 (a “ristretto”): shorter, more concentrated, syrupy and intense.
- 1:3 or more (a “lungo”): longer, lighter, more volume but more chance of bitterness creeping in.
Weigh your output, not just your input. Watching the shot hit 36 grams on the scale tells you far more than guessing by the lines on a shot glass.
5. Water Temperature
Temperature controls how efficiently water pulls flavor out of the grounds. The target range is 195°F to 205°F (90°C to 96°C), with around 200°F (93°C) as a reliable middle.
- Too cool and you’ll under-extract, landing on sour, sharp, undeveloped flavors.
- Too hot and you’ll scorch the grounds for a burnt, bitter shot.
And don’t sleep on water quality. Espresso is around 90 percent water, so what’s in your tap matters. Very hard water scales up your machine and mutes flavor; distilled water tastes flat and dead. Filtered water with a little mineral content is the sweet spot, and our guide on the influence of water quality on coffee brewing explains exactly why.
6. Pressure
Espresso is defined by pressure, that’s literally what makes it espresso instead of just strong coffee. The industry standard is roughly 9 bars (about 130 psi) of pressure forcing water through the puck. Most home machines are built around this number, and many “15 bar” machines on the box are really designed to deliver 9 bars at the puck where it counts. You don’t usually control this dial directly, but it’s why a real espresso machine produces crema and a drip brewer never will.
7. Extraction Time
For a standard double, you’re aiming for the shot to finish in 25 to 30 seconds, timed from the moment you start the pump. Think of time as your scoreboard, not your control: you don’t change the time directly, you change the grind until the time lands where you want it.
- Shot done in under 20 seconds? Too fast, grind finer.
- Shot dragging past 35 seconds? Too slow, grind coarser.
When dose, grind, ratio, temperature, and time all line up, you get that golden-brown crema and a balanced, sweet, full-bodied shot. That’s the whole game, and it’s the heart of what defines a good espresso.
Elevate your espresso game by prioritizing the freshness and quality of your coffee beans. Opt for freshly roasted whole beans, grind them just before brewing, and pay attention to the roast level.
Step-by-Step Guide: How to Pull a Great Espresso Shot
Knowing the factors is half of it. Here’s how to put them together into one repeatable routine. Run through it the same way every time and you’ll be able to tell exactly which variable to tweak when a shot goes sideways.
Step 1: Start With Fresh, Quality Beans
Reach for whole beans roasted within the last few weeks, ideally a medium to medium-dark roast for your first attempts. Skip anything pre-ground; it has already lost the aromatics you’re paying for. Keep them sealed and out of the light between sessions.
Step 2: Grind Fine and Even, Right Before You Brew
Grind only what you need for this shot. Use a quality burr grinder set to a fine, espresso-range grind, roughly table-salt texture. Start at a medium-fine setting and plan to adjust after your first pull based on the timing.
Step 3: Weigh Your Dose
Put your portafilter on a digital scale and dose 18 grams for a standard double (or whatever your basket is rated for). Consistency starts here. Guessing by volume is the fastest way to a shot that tastes different every morning.
Step 4: Distribute and Tamp Level
Settle the grounds evenly across the basket, give it a gentle tap or a quick distribution with your finger or a tool, then tamp straight down with firm, even pressure. The goal isn’t to crush it with all your might; it’s a level, compact puck. A tilted tamp causes channeling, where water punches a hole through one weak spot and leaves the rest under-extracted.
Step 5: Preheat Everything
Let the machine fully warm up, then run a blank shot of hot water through the group head and into your cup. This stabilizes the temperature and warms your cup so the espresso doesn’t lose heat the second it lands. Cold cup, cold shot. Don’t skip it.
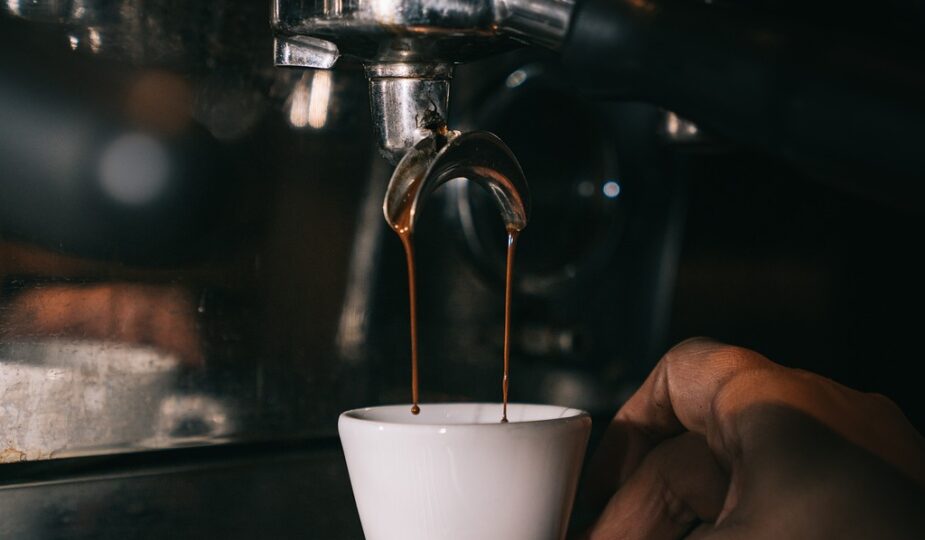
Step 6: Lock In and Pull the Shot
Insert the portafilter, put your weighed cup underneath, and start the pump and your timer together. You want a slow, steady stream the color of warm honey, often called the “mouse tail.” Stop when you hit your target output, about 36 grams for an 18-gram dose at a 1:2 ratio.
Step 7: Read the Shot and Dial In
Check the clock and the crema. Landed in the 25 to 30 second window with a thick golden crema? Taste it. Too fast and sour means grind finer; too slow and bitter means grind coarser. Change one thing at a time so you actually learn what each adjustment does.
Step 8: Clean As You Go
Knock out the puck, wipe the portafilter, and purge the group head after every shot. Wipe and purge the steam wand the moment you finish frothing. Descale on schedule. Old coffee oils turn rancid fast and will haunt every future shot with a stale, bitter edge, so don’t let your gorgeous equipment get gunky.
Step 9: Experiment and Build Your Drink
Once you can pull a clean shot, the fun starts. Try beans from different origins, play with your ratio, and learn to steam milk for lattes and cappuccinos. Our guides on frothing milk without a frother and making lattes at home will get you from straight shot to cafe-style drink in no time.
Try adjusting the brew time, experimenting with different coffee origins, or adding a touch of flavored syrup or spices to create your unique espresso blends.
Common Espresso Mistakes (and How to Fix Them)
Most “my espresso tastes bad” problems trace back to the same short list. Here’s how to diagnose yours fast.
- Sour, sharp, thin shot: under-extraction. Grind finer, raise the temperature slightly, or check that you didn’t dose too low.
- Bitter, harsh, burnt shot: over-extraction. Grind coarser, lower the temperature, or shorten the ratio.
- Shot gushes out and tastes hollow: grind too coarse, dose too low, or a tamp that left channels. Tamp level and grind finer.
- No crema or thin crema: usually stale beans (the number one culprit), too coarse a grind, or a machine that isn’t reaching pressure.
- Different result every single time: you’re not weighing. Weigh the dose, weigh the output, and use a timer. Consistency is a measurement problem.
One more reminder that earns its own line: keep grounds out of the cup by using a proper burr grinder and a clean basket. If stray grit is sneaking into your brew, our notes on preventing grounds in your coffee for any maker will sort it out.
Did you know that espresso is not a type of coffee bean, but rather a method of brewing coffee? It is made by forcing a small amount of near-boiling water through finely ground coffee beans. This concentrated and bold brew is loved by coffee enthusiasts all over the world.
Frequently Asked Questions
What is the ideal espresso ratio?
Start at 1:2, which means for every gram of coffee you aim for two grams of liquid espresso. An 18-gram dose pulling about 36 grams of espresso is the classic balanced shot. From there you can go shorter (1:1 to 1:1.5) for a more concentrated ristretto, or longer (1:3) for a lighter lungo, depending on the beans and your taste.
How long should an espresso shot take?
A standard double should finish in roughly 25 to 30 seconds, timed from when the pump starts. If it pours much faster it’ll taste sour and thin, so grind finer. If it drags well past 35 seconds it’ll taste bitter, so grind coarser. Adjust the grind, not the clock.
Why doesn’t my espresso have crema?
Weak or missing crema almost always points to stale beans, since the carbon dioxide that creates crema fades within a few weeks of roasting. The other usual suspects are a grind that’s too coarse, a dose that’s too low, or a machine not reaching proper pressure. Start with fresh beans roasted in the last two to three weeks and a finer grind.
Do I really need a burr grinder for espresso?
Honestly, yes. Espresso lives and dies on an even, fine grind, and blade grinders chop unevenly, producing a mix of dust and chunks that extract at completely different rates in the same shot. A burr grinder gives you the consistency and the fine adjustment espresso demands. It’s the upgrade that pays off on every cup.
What temperature should the water be for espresso?
Aim for 195°F to 205°F (90°C to 96°C), with about 200°F (93°C) as a safe middle. Too cool gives you sour, under-developed shots; too hot scorches the coffee into bitterness. And since espresso is mostly water, use filtered water with a little mineral content rather than hard tap or flat distilled water.
The Bottom Line
A great espresso isn’t magic and it isn’t about owning the fanciest machine on the block. It’s fresh beans, a weighed dose, a fine and even grind, a 1:2 ratio, water around 200°F, proper pressure, and a 25 to 30 second pull, all working together. Nail those and read what the shot in front of you is telling you, then change one thing at a time.
You’re going to pull a few duds at first. Everybody does. Keep your scale and timer out, stay curious, and within a week or two you’ll be making espresso at home that genuinely beats your neighborhood cafe. Got a tip of your own or a question I didn’t cover? Leave it in the comments, and go check out our other guides over at Ten Coffees for more from the cup up.
Related Articles:
- How to Make Vietnamese Coffee: The Strong, Bold Coffee
- How to Hario V60: The Ultimate Guide to Making Perfect Coffee
- How to Aeropress: The Ultimate Guide to Making Amazing Coffee at Home
- How to Turkish Coffee: An Invigorating Coffee Experience
- How to Drip Coffee: The Best Way to Start Your Day
Stay caffeinated and enjoy your perfectly brewed espresso!