How to AeroPress: The Ultimate Guide to Making Amazing Coffee at Home
Let’s settle something right now: the AeroPress is the most forgiving brewer you will ever own, and it makes a cup that punches way above its little plastic price tag. If you’ve been intimidated by it, or you bought one, used it twice, and shoved it in a drawer, you’re in the right place. By the time you finish this guide you’ll have a foolproof recipe (down to the gram, the degree, and the second), the inverted method demystified, the mistakes everyone makes so you can skip them, and a few tricks I save for people I actually like.
No flowchart required. Just you, hot water, and about ninety seconds. Let’s go.
Table of Contents
- What Is an AeroPress (and Why People Are Obsessed)
- The History of the AeroPress
- What You’ll Need
- How AeroPress Brewing Actually Works
- The Foolproof AeroPress Recipe (Standard Method)
- The Inverted AeroPress Method (Step by Step)
- Coffee-to-Water Ratios and Dialing In Taste
- Common AeroPress Mistakes (and How to Fix Them)
- Tricks to Level Up Your AeroPress Coffee
- Frequently Asked Questions
- The Bottom Line
What Is an AeroPress (and Why People Are Obsessed)
The AeroPress is a hand-powered brewer that combines two things most methods keep separate: immersion (your grounds soak in hot water, like a French press) and pressure (you push the water through with a plunger). That combo pulls out a clean, rich, low-bitterness cup in under two minutes. It’s basically a giant syringe for coffee, and I mean that as the highest compliment.
Here’s why it earns the cult following: it’s nearly unbreakable, it weighs almost nothing, it cleans up in about ten seconds, and it costs less than a couple of fancy lattes. It’s the brewer I’d hand a nervous beginner and the one a lot of pros take camping. If you’re still building out your setup, our roundup of innovative brewing equipment is a good next stop — but honestly, the AeroPress alone will get you a long way.
The History of the AeroPress
The AeroPress was invented by Alan Adler — a Stanford engineering lecturer who, fun twist, is also the guy behind the Aerobie flying ring that holds distance-throw world records. He was annoyed that a single cup of drip coffee came out bitter and inconsistent, so he started tinkering with shorter brew times and gentle pressure to tame the harshness.
He landed on the design and brought it to market in 2005. It caught on fast with coffee nerds, and there’s now a World AeroPress Championship where people compete with wildly creative recipes. Not bad for a device that looks like it came from a science lab — because, well, it sort of did.
What You’ll Need
The beauty here is how little gear it takes. The non-negotiables:
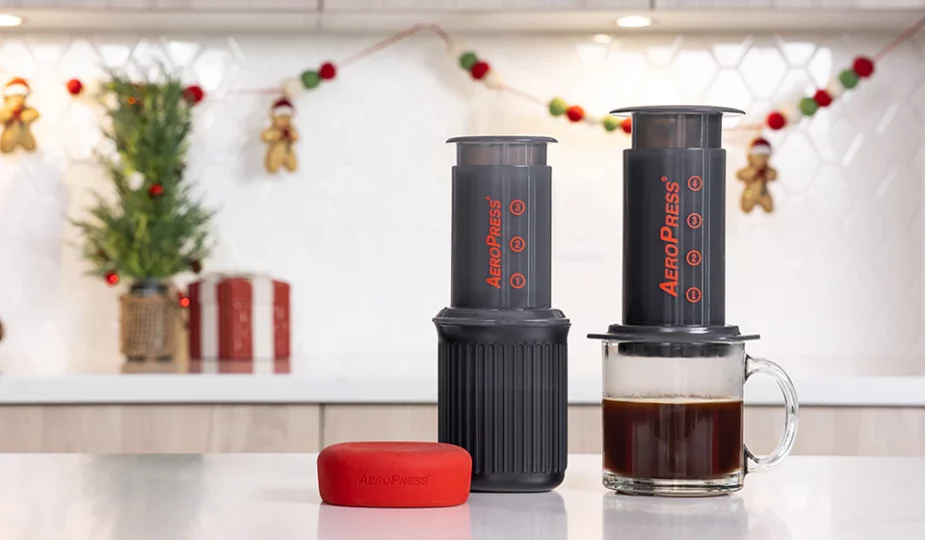
- The AeroPress — the chamber, the plunger, and the filter cap.
- A paper filter (or a reusable metal one — more on that below).
- Freshly ground coffee — ideally beans you ground that morning.
- A mug or sturdy cup that the AeroPress can sit on without tipping.
- Hot water, off the boil.
Want to go from “pretty good” to “wait, did I make this?” Add these:
- A kitchen scale (0.1g is lovely, 1g is fine). Eyeballing coffee is how you get a different cup every single day. A scale is the cheapest upgrade to consistency there is.
- A gooseneck kettle with a thermometer, or any thermometer. Temperature matters here, and I’ll die on that hill.
- A burr grinder for an even grind. Blade grinders make coffee dust and boulders in the same batch, and your cup tastes confused.
Don’t have a grinder yet? Ask your roaster to grind for AeroPress, or read up on dialing in the right gear in our guide to making the best coffee at home. And if you’re choosing between brewers, our take on whether the AeroPress is worth buying lays out who it’s really for.
How AeroPress Brewing Actually Works
Quick science, no lecture, I promise. When hot water hits ground coffee, it dissolves the good stuff — sugars, acids, and aromatic oils — in roughly that order. Sweetness and brightness come out early; bitterness and astringency come out late if you overdo time, heat, or grind fineness.
The AeroPress wins because it keeps the contact time short and finishes with gentle pressure through a paper filter. The filter traps oils and fine sediment, so you get a clean cup with very little grit. Short brew, controlled temperature, clean filter — that’s the whole magic trick. Master those three levers and you can hit sweet, balanced, and smooth on demand.
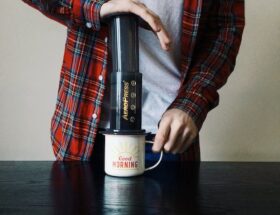
The Foolproof AeroPress Recipe (Standard Method)
This is the recipe I’d start anyone on. It’s the “upright” method — chamber sitting on your mug, the classic way. Reliable, fast, and almost impossible to ruin.
Your numbers:
- Coffee: 15g (about 2.5 tablespoons)
- Water: 230–250g, which lands you near a 1:16 ratio
- Grind: medium-fine — think table salt, slightly finer than drip
- Water temperature: 175–185°F (80–85°C) for medium roasts; nudge up toward 195°F for light roasts, down toward 175°F for dark
- Total brew time: about 1:30
- Boil your water and let it rest a minute. Off-the-boil is the goal. Water straight off a rolling boil scorches the grounds and gives you that scratchy, bitter edge.
- Put a filter in the cap and rinse it. Run hot water through the paper filter in the cap. This kills the papery taste and warms everything up. Don’t skip it.
- Assemble and preheat. Screw on the cap, set the AeroPress on your mug, and pour a splash of hot water through to warm the chamber. Dump that water out.
- Add coffee and tare your scale. Drop in your 15g of grounds, give the chamber a little shake to level the bed, and zero out your scale.
- Pour and saturate. Pour in all your water, making sure every ground gets wet. Watch it bloom — that bubbly puff is fresh coffee releasing CO2, and it’s a good sign.
- Stir gently. Three quick stirs with the paddle (or a spoon). This evens out the extraction so you don’t get weak spots and over-extracted spots in the same cup.
- Insert the plunger and wait. Pop the plunger in just enough to create a seal — this pulls up slightly and stops dripping. Let it steep until about the 1:00 mark.
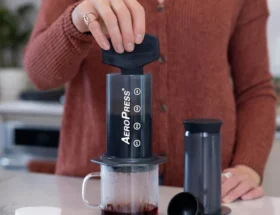
- Press slow and steady. Push down with gentle, even pressure. You’re aiming for 20–30 seconds of pressing. When you hear a hiss, stop. Pushing past the hiss squeezes bitter dregs into your cup.
Taste it. Too sour or thin? Grind finer or bump the temperature. Too bitter or harsh? Grind coarser, cool the water, or press a touch faster. You’re not chasing perfection on the first try — you’re learning your beans. (Yes, I’m extra about it, and yes, you’ll thank me.)
The Inverted AeroPress Method (Step by Step)
The inverted method flips the whole thing upside down so nothing drips through while your coffee steeps. You get full control over contact time, which is why a lot of competition recipes use it. It’s a little more theatrical and there’s a flip involved, so do it over the sink the first few times. No shame.
- Assemble upside down. Push the plunger about an inch into the chamber, then stand it on the flat plunger end so the open chamber points up.
- Add coffee. 15–17g of medium-fine grounds into the upward-facing chamber.
- Pour water. Add your hot water (around 230g), saturating all the grounds. Stir three times.
- Cap it. Put a rinsed filter in the cap and screw it on top while it steeps. Steep 1:00 to 1:30.
- Flip it. Set your mug upside down on top of the cap, then confidently flip the whole assembly so the mug is on the bottom and the plunger points up. Commit to the flip — hesitation is how you wear your coffee.
- Press. Slow, even pressure for 20–30 seconds. Stop at the hiss.
Why bother? The inverted method shines with light, delicate, fruity beans where you want a longer steep without water sneaking through early. For your everyday cup, the standard method is plenty. For chasing flavor on a special bag, invert. If you want to push the format even further, our AeroPress recipes for brewing beyond ordinary coffee is a rabbit hole worth falling into.
Coffee-to-Water Ratios and Dialing In Taste
The coffee-to-water ratio is the single biggest dial on strength. A few reliable starting points:
- 1:16 (15g coffee : 240g water) — balanced, smooth, my default daily cup.
- 1:14 (17g : 240g) — bolder and richer, great with milk.
- 1:12 to 1:10 — concentrated, espresso-style. Brew strong, then dilute with hot water for an Americano-ish cup, or pour over milk for a faux latte.
Once your ratio feels right, the fine-tuning happens with three more levers:
- Grind size: finer = stronger and more extracted; coarser = lighter and brighter. Adjust this first when something’s off.
- Water temperature: hotter pulls more out (good for light roasts), cooler pulls less (kinder to dark roasts).
- Brew time: longer steep = more body and more risk of bitterness. Keep most brews under two minutes.
Change one variable at a time. Change three at once and you’ll have a tasty cup with zero idea how you got there — which does you no good tomorrow.
Common AeroPress Mistakes (and How to Fix Them)
Almost every “my AeroPress coffee is bad” problem comes down to one of these. Fix them and you’ve fixed your cup:
- Water too hot. Boiling water scorches grounds. Let it sit a minute, or aim for 175–185°F.
- Wrong grind. Too coarse tastes sour and watery; too fine clogs and tastes bitter and is brutal to press. Medium-fine is home base.
- Skipping the filter rinse. A dry paper filter adds a cardboard note. Ten seconds of rinsing fixes it.
- Pressing too hard or past the hiss. Forcing it pushes bitter sediment through. Slow and steady, and stop at the hiss.
- No scale. Guessing the dose gives you a different cup every day. Weigh it.
- Stale beans. No technique saves coffee that’s been open for two months. Buy fresh, in smaller bags, and store it sealed and away from light.
And the most common one of all — fine grounds slipping into your cup if your filter shifts or you over-grind. Our guide on preventing grounds in your coffee covers the fixes for that one across every brewer.
Tricks to Level Up Your AeroPress Coffee
Once the basics are second nature, here’s where it gets fun:
- Use good water. Coffee is mostly water, so bad water makes mediocre coffee. Filtered water with a little mineral content tastes noticeably fuller than distilled (which tastes flat) or heavy tap water.
- Try a metal filter. A reusable metal filter lets more oils through for a heavier, fuller body — closer to French press, with a little more texture. Paper gives you cleaner and brighter. Keep both and switch based on the bean.
- Double-filter for clarity. Stack two paper filters for an extra-clean, tea-like cup that really shows off a delicate light roast.
- Bloom first. Pour just enough water to wet the grounds, wait 30 seconds, then add the rest. That pre-soak evens out extraction, especially with very fresh beans.
- Make AeroPress cold brew. Brew with room-temperature or cold water and let it steep 10–12 minutes (or longer in the fridge before pressing) for a smooth, low-acid concentrate. Press, then pour over ice and milk.
The bean matters as much as the method — a tired commodity blend can only go so far. If you want to taste what this brewer can really do, start with choosing the right coffee beans and work up from there.
Frequently Asked Questions
What grind size is best for the AeroPress?
Medium-fine is the sweet spot — a touch finer than drip coffee, roughly like table salt. Too coarse and your cup tastes thin and sour; too fine and it clogs, presses hard, and turns bitter. If you’re brewing fast (under a minute) you can go a bit finer; for longer steeps, go slightly coarser.
What water temperature should I use?
Aim for 175–185°F (80–85°C) for most coffee. Light roasts like it hotter (up to about 195°F) to fully extract their bright flavors; dark roasts prefer cooler water (around 175°F) so they don’t turn bitter. If you don’t have a thermometer, boil your water and let it sit for about 60 seconds before pouring.
Standard or inverted method — which is better?
Neither is “better,” they’re for different moods. The standard (upright) method is faster, simpler, and perfect for daily coffee. The inverted method gives you full control over steep time with no early dripping, which helps with delicate light roasts and experimental recipes. Start standard; graduate to inverted when you want to fine-tune.
Can you make espresso with an AeroPress?
Not true espresso — that needs nine bars of pressure, and you’ll never hit that by hand. But you can brew a strong, concentrated shot using a tight ratio (around 1:8 to 1:10) and a fine grind. It’s a fantastic espresso-style base for an Americano or a milk drink, just don’t expect a real crema.
How do I clean an AeroPress?
This is the best part. Unscrew the cap, hold the AeroPress over the trash or compost, and push the plunger the rest of the way — the spent grounds eject in one tidy puck. Rinse the seal and chamber under the tap, and you’re done in about ten seconds. Every now and then, pop the rubber seal off and give it a deeper wash so it doesn’t pick up oils.
How long does an AeroPress last?
Years, with basically no babysitting. The main wear item is the rubber plunger seal — if it gets stiff or stops sealing well after heavy use, you can buy a replacement cheaply instead of a whole new brewer. Treat it kindly and one AeroPress will outlast most of the gadgets in your kitchen.
The Bottom Line
Here’s the whole thing in one breath: weigh 15g of coffee, ground medium-fine, hit it with 240g of water around 180°F, stir, steep about a minute, and press slow until you hear the hiss. That’s a genuinely great cup, and it cost you less effort than waiting in a café line.
The AeroPress rewards curiosity, so play with it. Tweak one thing at a time, keep notes on what you liked, and before long you’ll be brewing on feel — the way Grandma Dora cooked, no measuring required. If you’re still mapping out your home setup, our guide to the best coffee maker for your kitchen pairs nicely with everything here.
Now go brew yourself something good — and maybe make a cup for someone who needs it too.
Hey! Join the fun, and leave a comment
- What’s your go-to AeroPress recipe — standard or inverted?
- Team paper filter or team metal filter, and why?
- Got an AeroPress question you’re stuck on? Drop it below.
We’d love to hear how your brewing goes.