How to Hario V60: The Ultimate Guide to Making Perfect Coffee
Here’s the thing about the Hario V60: it looks like the easiest brewer on the shelf and behaves like the fussiest. One little cone, one paper filter, a kettle of hot water. What could go wrong? Plenty. But once you understand what that 60-degree cone is actually doing, you can pull a cup so clean and sweet it’ll ruin drip coffee for you forever. Sorry in advance.
This guide gives you the whole playbook: a real recipe with exact grams, temperatures, and times, the pour technique that separates flat coffee from bright-and-juicy, the mistakes everyone makes their first month, and a troubleshooting chart for when your cup tastes like a disappointment. By the end you’ll brew a V60 with intention instead of hope. Let’s go.
Table of Contents
History of the Hario V60
Hario is a Japanese glassware company that’s been around since 1921, originally making heat-resistant lab equipment. (The name comes from “the king of glass” — they’re not shy.) The Hario V60 dripper launched in 2004 and quietly became the most copied pour-over device on the planet. You’ll see its silhouette in every third-wave cafe from Tokyo to Portland, and for good reason: it makes a transparent, tea-like, flavor-forward cup that shows off a good bean instead of bulldozing it.
Three design choices make it work, and they all matter when you brew:
- The 60-degree cone. The steep angle funnels water toward a single point, so the coffee bed forms a deep cone and the water has to travel through more grounds. More contact, more extraction.
- One big hole at the bottom. Unlike a Melitta-style dripper with tiny holes that meter the flow for you, the V60’s wide opening lets the water leave fast. That means you control the brew speed with your grind and your pour. Freedom and responsibility, baby.
- Spiral ribs on the inside wall. Those raised ridges keep the paper from sealing flat against the cone, so air escapes and water drains evenly down the sides instead of getting trapped.
Interesting fact about the Hario V60
The “V60” name is literal: “V” for the cone and “60” for that 60-degree angle. That geometry is the entire personality of this brewer. It promotes a more even extraction of the coffee grounds than a flat-bottom dripper, which is exactly why it tastes so crisp — and exactly why it punishes a sloppy pour. The cone giveth and the cone taketh away.
Essential Equipment for V60 Brewing
You don’t need a lab. You do need a few specific things, and skipping the scale or the gooseneck is the number-one reason beginners give up. Here’s the honest list of equipment, ranked by how much it actually matters:
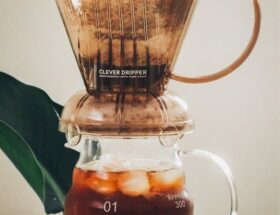
- The V60 dripper — size 02 is the sweet spot for one to two cups. Ceramic holds heat well, plastic is cheap and travels great, glass and copper are mostly for the aesthetic. They all brew the same.
- V60 paper filters — and they must be the cone-shaped ones cut for the V60. A flat-bottom filter shoved into a cone will channel water down one side and wreck your cup. Don’t improvise here.
- A digital scale that reads to 0.1g — non-negotiable. Pour-over is a ratio game, and eyeballing scoops is how you get a different (usually worse) cup every single morning.
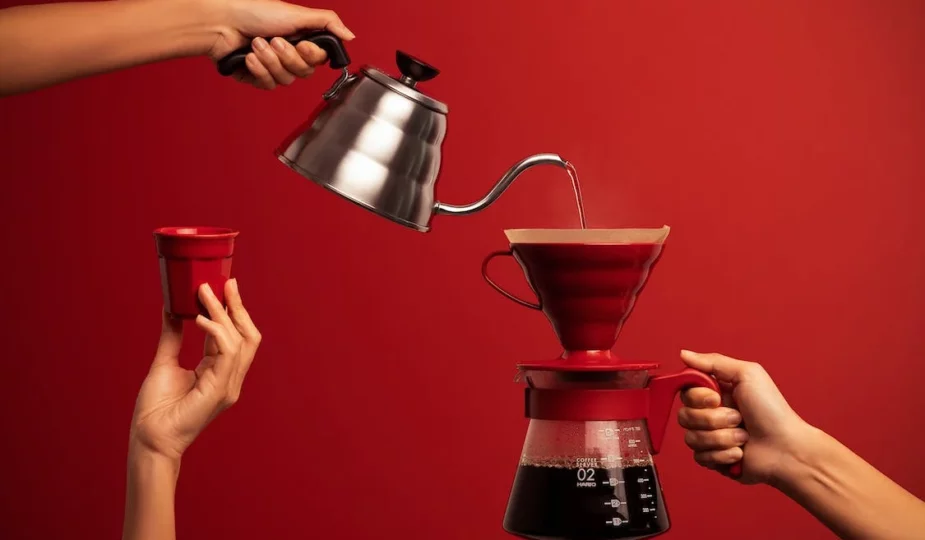
- A gooseneck kettle — the swan neck gives you a thin, controllable stream. Pouring V60 with a regular kettle is like writing calligraphy with a fire hose.
- A burr grinder — fresh grounds matter more than almost anything. A blade grinder makes uneven dust-and-boulders that extract unevenly. If you’re shopping, our guide to choosing the right grinder for your brewing method will steer you straight.
- A timer — your phone is fine. Total brew time tells you instantly whether your grind is in the right zone.
- A mug or carafe — and pre-heat it, more on that below.
The Science of Brewing Hario V60 Coffee
Good coffee is just controlled extraction — pulling the right amount of soluble flavor out of the grounds and stopping before you pull the bad stuff. Three dials control it. Learn these and you can fix any cup.
- Coffee-to-water ratio. The V60 lives happily between 1:15 and 1:17. A 1:16 ratio (say, 22g of coffee to 352g of water) is a rock-solid starting point that suits almost any bean. Want it stronger? Move toward 1:15. Want it lighter and more tea-like? Drift to 1:17. If you want to dial it precisely, our piece on adjusting coffee strength goes deeper.
- Water temperature. Aim for 195–205°F (90–96°C). Hotter water extracts faster and harder — great for dense light roasts, risky for dark roasts that already taste roasty. No thermometer? Boil, then let the kettle sit off the heat for about 30–45 seconds.
- Grind size and time. These two are joined at the hip. Grind finer and water moves slower, so you extract more (and risk bitterness). Grind coarser and water rushes through, so you extract less (hello, sourness). A medium grind — think table salt, a touch finer than what you’d use for a French press — should give you a total brew time around 2:30 to 3:30. If your brew finishes in 1:45, go finer. If it’s still dripping at 4:30, go coarser.
And the bloom — that’s the magic first step where you pour just enough water to wet the grounds and they puff up like a soufflé. That puffing is CO2 escaping from the fresh roast. Letting it vent for 30–45 seconds before the main pour means water can actually soak the grounds evenly instead of skating over gas pockets. It’s worth understanding why; we wrote a whole guide on the coffee bloom and its impact on flavor.
Step-by-Step: How to Brew the Hario V60
Here’s a reliable, repeatable recipe. We’ll use 22g of coffee and 352g of water (1:16) for a generous single mug. Scale it to your dripper and your appetite, but keep the ratio.
- Heat your water to 200°F (93°C). Weigh out 22g of beans while it heats.
- Rinse the filter. Drop the paper in the cone, set it over your mug or carafe, and pour hot water through it until it’s soaked. This rinses away papery taste AND pre-heats your gear. Dump that rinse water out. Don’t skip this — it’s the difference between coffee and coffee that tastes faintly like a cardboard box.
- Grind and add the coffee. Grind to medium, tip it into the wet filter, and give the dripper a gentle shake to level the bed flat. Set your scale to zero.
- Bloom. Start your timer and pour about 50g of water (roughly twice the weight of your coffee), wetting all the grounds. Watch it dome up. Wait 30–45 seconds.
- First main pour. Pour in slow, steady concentric circles from the center outward — never directly down the sides — until you reach about 200g total. Keep the stream thin and controlled.
- Second pour. When the water level drops to about the level of the bed, pour again in circles up to your full 352g. You’re aiming to finish all your pouring by around the 2:00 mark.
- Let it draw down. Give the dripper a tiny swirl to settle the grounds flat against the bottom, then let gravity finish the job. You want the bed to look like a flat, even pancake, not a crater or a wall of grounds stuck up the sides.
- Done. Total time should land around 2:30–3:30. Lift the dripper off, swirl your cup, and taste before you doctor it.
That’s the whole ritual. Five minutes, start to finish, and most of that is just water finding its way down. Want the masterclass version? The video below from a champion barista walks through advanced V60 technique frame by frame.
Want to try the 4:6 method?
Once the basic recipe feels like second nature, graduate to Tetsu Kasuya’s famous 4:6 method — the technique that won him the 2016 World Brewing Cup. You split your water into five pours: the first 40% (in two pours) controls sweetness versus acidity, and the last 60% (in three pours) controls strength. With 20g of coffee and 300g of water, that’s two pours within the first 40% and three within the last 60%, finishing around 3:30. It gives you a dial for taste that the standard recipe doesn’t, and it’s genuinely fun to play with on a weekend.
Hario V60 Tips and Tricks
Small things that quietly upgrade every cup:
- Use fresh, high-quality beans. The V60 hides nothing, so it rewards good coffee beans and exposes stale ones. Buy whole bean, use it within three to four weeks of the roast date, and store it right — here’s how to properly store coffee beans so they don’t go flat.
- Grind right before you brew. Coffee goes stale fast once it’s ground — we’re talking minutes for the brightest aromatics. Grind to order, every time.
- Filtered water, always. Coffee is 98% water. Hard, heavily chlorinated tap water tastes exactly that way in the cup. Filtered or bottled spring water makes a shocking difference.
- Pour slow, pour from the center. A thin, deliberate spiral keeps the bed even. A fast pour digs channels, and channeled water means part of your coffee is over-extracted and part is barely touched.
- Pre-heat the mug. A cold ceramic mug steals heat from your coffee on contact. The filter rinse already gives you a free chance to warm it.
- Keep a brew log for a week. Jot the dose, ratio, grind setting, and time. You’ll find your personal sweet spot faster than you think, and then you can stop guessing forever.
Creative Ways to Add Flavor to Your V60
A well-brewed V60 is plenty on its own — but nobody’s stopping you from playing. A few ideas that actually work:
- A tiny pinch of salt in the dry grounds tames bitterness and rounds out an aggressive roast. We mean tiny — a few crystals, not a teaspoon.
- Warm spices like a pinch of cinnamon, cardamom, or nutmeg added to the grounds before brewing for a cozy, autumnal cup.
- A splash of vanilla or a flavored syrup stirred in after brewing if you like things sweet.
- Fresh citrus peel or a couple of chocolate shavings dropped in the cup to play up the bean’s natural notes.
If sweet is your love language, our roundup of the secret to sweeter coffee has more tricks that don’t involve dumping in three sugars.
Troubleshooting Common V60 Problems
The V60 is honest to a fault — when something’s off, it tells you in the flavor. Here’s how to read the signals and fix them. (For a broader rescue mission, our guide to 9 reasons your coffee is bitter and how to fix it covers more ground.)
Bitter or harsh (over-extraction): If your coffee tastes bitter, drying, or overly strong, you’ve pulled too much. Try these:
- Grind coarser so water moves through faster.
- Pour more slowly and gently to avoid agitating the bed too much.
- Lower your water temperature a few degrees, especially with dark roasts.
Weak or sour (under-extraction): If your coffee tastes thin, sour, or watery, you didn’t pull enough. Try these:
- Grind finer to slow the flow and increase contact time.
- Nudge the water temperature up toward 205°F.
- Extend the brew time by pouring a touch more slowly.
Uneven, muddled flavor: Inconsistent taste usually means uneven saturation. Try these:
- Pour in slow, even concentric circles so every ground gets wet.
- Use a gooseneck kettle for a controllable stream.
- Give the dripper a gentle swirl after the final pour to flatten the bed.
Stuck or painfully slow flow: If the water pools and won’t drain, try these:
- Grind coarser — clogging almost always means your grind is too fine.
- Make sure the filter is seated against the ribs and not sealed flat to the cone.
- Pour more gently so you’re not pushing fines down into the filter and blocking it.
Burnt or ashy taste: If your coffee tastes scorched, try these:
- Keep water in the 195–205°F range — boiling water poured straight onto coffee is a common culprit.
- Shorten the brew time to stop over-extraction.
- Consider a lighter roast; some dark roasts simply taste burnt by design.
Work through these one variable at a time — change one thing, taste, repeat — and you’ll zero in on your perfect cup fast.
Frequently Asked Questions
What grind size is best for the Hario V60?
A medium grind, roughly the texture of table salt — finer than a French press but coarser than espresso. Let your timer be the judge: if the whole brew finishes faster than about 2:30, go finer; if it’s still dripping past 3:30 to 4:00, go coarser. Grind size and brew time are two ends of the same lever.
What is the ideal coffee-to-water ratio for a V60?
Start at 1:16 — that’s 1 gram of coffee for every 16 grams of water, like 22g coffee to 352g water. Move toward 1:15 for a stronger, bolder cup, or toward 1:17 for something lighter and more tea-like. Weigh both the coffee and the water; this is where a scale earns its keep.
What water temperature should I use?
Between 195°F and 205°F (90–96°C). The hotter end suits dense light roasts that need more energy to extract; the cooler end is kinder to dark roasts that can turn bitter. No thermometer? Boil, then wait about 30–45 seconds before you pour.
What’s the most common mistake beginners make?
Pouring too fast and not weighing anything. A rushed pour digs channels through the coffee bed so water escapes without extracting evenly, and scooping by eye means a different cup every day. Slow your pour to a thin spiral and put everything on a scale — those two fixes solve most bad V60s.
Do I really need to rinse the paper filter?
Yes. Rinsing washes out the papery taste from the filter and pre-heats your dripper and mug in one move. Skip it and you’ll often catch a faint cardboard note in an otherwise clean cup. It takes ten seconds and there’s no reason not to.
Now Go Brew One
The V60 isn’t hard — it’s just honest. Give it a fresh bean, the right grind, water in the right temperature window, and a slow, patient pour, and it hands you a cup so clean and sweet you’ll wonder why you ever settled for a sleepy auto-drip. Get the fundamentals down and the rest is just happy tinkering.
And once you’ve fallen for pour-over, you’ll want to keep going — maybe an AeroPress for travel or a Moka pot for something bolder, or the broader art of dialing in great coffee at home. Visit Ten Coffees for all your supplies and expert advice.
Tell us how it went
Brewed your first V60 with this guide? We want to hear about it. Drop a comment below with your dose, your ratio, and how it turned out — and if you found a tweak that works for you, share it so the rest of us can steal it. Join our community of coffee lovers and let’s brew the perfect cup together.