The Art of Coffee Blending: Creating Unique Coffee Roasts at Home
Here is the thing nobody tells you about a great cup of coffee: most of the ones you have loved were never a single coffee at all. That café drip you keep going back to? A blend. That bag labeled “house” or “breakfast” or “morning”? Blend. Coffee blending is the quiet trick behind almost every consistent, crave-able cup, and the best part is you can absolutely do it on your own kitchen counter with beans you already buy.
This guide is the practical, do-it-tonight version. You will get the exact ratios I start beginners on, a five-step method for building a balanced blend, the mistakes that ruin homemade blends (and how to dodge them), how to dial in grind and brew so your blend actually tastes like your hard work, and a short FAQ at the end for the questions everyone asks. No mystery, no “alchemy,” no flowchart. Just beans, a scale, and a little nerve.
Table of Contents
- What Coffee Blending Actually Is (and Why It Works)
- How to Blend Coffee at Home: A 5-Step Method
- Crafting Your Signature House Blend
- The Art of Creating Unique Blends
- Common Blending Mistakes (and How to Avoid Them)
- Choosing the Right Brewing Method for Your Blend
- Frequently Asked Questions
- Now Go Build Your Blend
What Coffee Blending Actually Is (and Why It Works)
Coffee blending is combining two or more coffees so the finished cup tastes better, or more consistent, than any of them would alone. That is the whole job. You are pairing beans of different origins, roast levels, and flavor profiles so one fills in what another is missing.
Think of it like cooking. A bright, fruity Ethiopian coffee on its own can feel thin and a little sharp by the bottom of the mug. A heavy Sumatra on its own can feel flat and one-note. Put them together in the right proportion and suddenly you have body AND sparkle. That is the payoff: a cup that is more complete than its parts.
Two things make blending worth your time:
- Balance. You can engineer the exact cup you want, more body, less acidity, more sweetness, by leaning on the beans that deliver each trait.
- Consistency. Single-origin coffees change a lot season to season. A blend lets you swap one component and keep the overall taste steady, which is exactly why coffee shops build house blends instead of selling whatever lot showed up that week.
A Quick Word on Where Blends Came From
Blending is not some modern third-wave invention. People have combined coffees for centuries, originally for practical reasons, stretching supply during shortages and smoothing out the rough edges of whatever beans were on hand. By the 19th century, named blends became a point of pride in European coffeehouses. Mocha-Java, the pairing of bright Yemeni coffee with earthy Indonesian Java, is often called the original blend, and people still drink it today.
The takeaway for you: blending has a long track record, and it carries real cultural significance. You are joining a very old, very delicious tradition, not inventing one.
The Simple Science You Need (No Lab Coat)
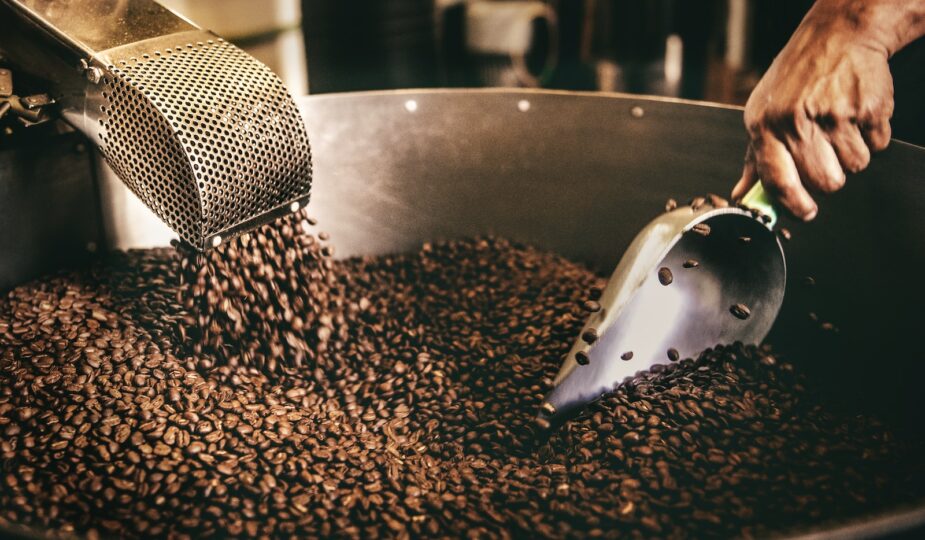
You do not need a chemistry degree, but a couple of facts make everything click. Beans from different regions have different densities and moisture content, which means they roast at slightly different speeds and pull different flavors. That is why most pros blend AFTER roasting, not before, so each bean gets the roast it actually wants.
Roast level is your biggest flavor lever. As a rule of thumb:
- Lighter roasts keep more origin character: brighter acidity, fruit, florals, tea-like delicacy.
- Darker roasts trade origin flavor for roast flavor: heavier body, lower perceived acidity, chocolate, smoke, and roasty bitterness.
Knowing that, a blend almost designs itself: pick something for brightness, pick something for body, and decide which one you want to lead. The ratio does the rest. (More on roast levels in our light vs. medium vs. dark roast guide if you want the full breakdown.)
The Four Decisions Behind Every Blend
Before you start scooping beans, make these four calls. Get them right and the rest is just tasting.
- Bean selection. Start with fresh, high-quality coffee you can buy reliably. A blend is only as good as its weakest bean, so do not try to “fix” a stale or cheap coffee by hiding it in a mix. It will not work. Pick beans you would happily drink on their own. Need help choosing? Our guide on selecting the perfect coffee beans walks through it.
- Roast levels. Decide your spread. A common starting point is one lighter, brighter coffee and one darker, fuller one, so you have both ends of the spectrum to balance.
- Flavor balancing. Decide what you are chasing, bright and lively, rich and chocolatey, smooth and low-acid, and let that goal pick your lead bean.
- Consistency. Write everything down. Grams, ratios, roast levels, brew notes. A blend you cannot repeat is a happy accident, not a recipe.
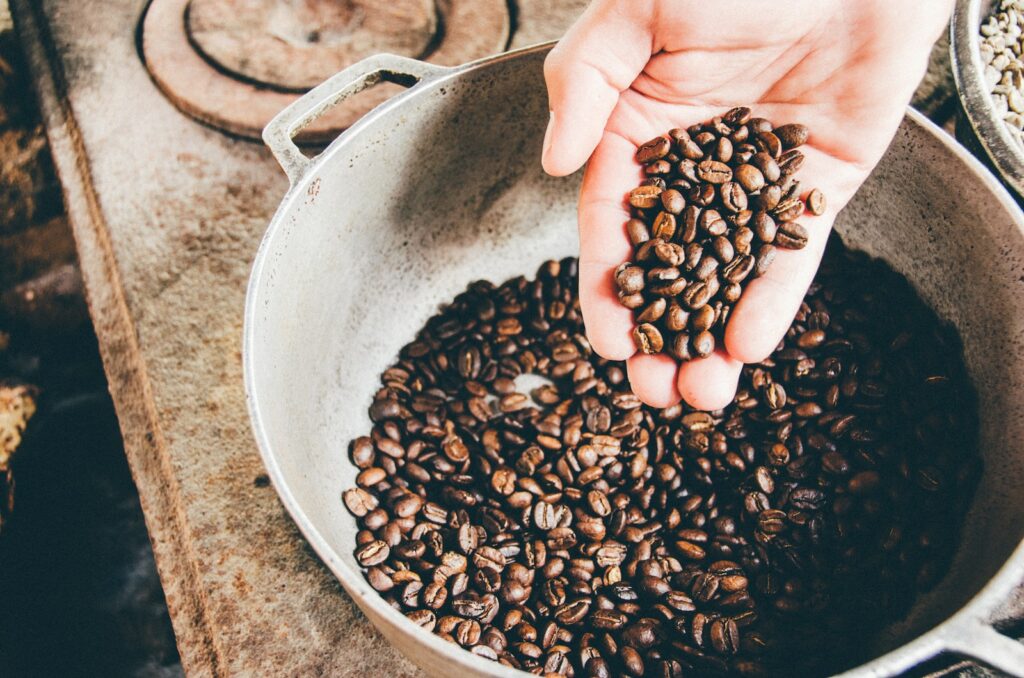
How to Blend Coffee at Home: A 5-Step Method
Here is the method I hand every beginner. It uses a kitchen scale and beans you already own. Do not skip the scale, scooping by volume is how you end up with a blend you can never make twice.
- Pick your two anchors. One “bright” coffee (think a washed African or Central American, lighter roast) and one “base” coffee (think a Sumatra, Brazil, or anything medium-to-dark with body). Two beans is plenty to start. You can add a third later for complexity.
- Start at 70/30. Weigh 70 grams of your base and 30 grams of your bright coffee. The base leads, the bright lifts it. This is the single most forgiving ratio for a first blend.
- Brew the SAME way every time. Pick one method and one recipe, a standard 1:16 ratio (say 20 g coffee to 320 g water) is a clean baseline, so the only thing changing between tests is the blend itself.
- Taste and judge against your goal. Too flat or heavy? Add more of the bright coffee. Too thin or sour? Add more base. Adjust in 10 percent steps: try 60/40, then 50/50, until the cup hits what you pictured.
- Lock it in and write it down. Once you nail it, record the exact grams, beans, roast levels, and brew recipe. Congratulations, you have a house blend. Now you can repeat it forever.
A few starting recipes to steal:
- Smooth morning cup: 70% Brazil (medium) + 30% Colombia (medium). Chocolatey, nutty, easygoing.
- Bright and lively: 60% Colombia (medium-light) + 40% Ethiopia (light). Fruit and florals up front, enough body underneath.
- Bold espresso base: 60% Sumatra (dark) + 40% Brazil (medium-dark). Heavy, low-acid, built for milk drinks.
Crafting Your Signature House Blend
A “house blend” is just the everyday coffee that represents you, the one you reach for on autopilot, the one a regular at your kitchen counter would ask for by name. It is not the flashiest cup you can make. It is the most reliable one. That is the point.
Good house blends share four traits. Aim for all of them:
- Balance. No single trait shouts over the others. Acidity, body, and aroma sit in agreement.
- Consistency. Cup at 7 a.m. tastes like the cup at 4 p.m. Every time.
- Versatility. It plays nice across drip, espresso, and French press without falling apart.
- Broad appeal. Your coffee-snob friend and your “just give me something hot” friend can both enjoy it.
Tips for Dialing In Your House Blend
- Build around a workhorse base. A clean, sweet medium-roast Brazil or Colombia makes a brilliant backbone, 50 to 70 percent of the blend, then layer accents on top.
- Add character, do not bury it. One bright or aromatic coffee at 20 to 40 percent is usually enough to make the whole cup interesting. More than that and your “everyday” coffee starts demanding too much attention.
- Keep your roast spread tight. If a regular drinker is your audience, a wild light-plus-very-dark combo can read as muddled. Medium-leaning blends tend to please the most people.
- Taste over days, not minutes. A blend you love on a quiet Sunday and a blend you love before work on Tuesday are different judges. Live with it for a week before you call it final.
The table below shows how a few common beans behave so you can spot which job each one wants in your blend.
| Coffee Bean | Origin | Flavor Profile | Roast Level | Best Brewing Method |
|---|---|---|---|---|
| Arabica | Central America | Fruity, Floral, Bright Acidity | Light to Medium | Pour-over, Aeropress |
| Robusta | Africa | Bold, Earthy, Nutty | Medium to Dark | Espresso, French Press |
| Ethiopian Yirgacheffe | Ethiopia | Citrus, Floral, Tea-like | Light | Chemex, V60 |
| Sumatra Mandheling | Indonesia | Earthy, Herbal, Full-bodied | Medium to Dark | French Press, Espresso |
The Art of Creating Unique Blends
Once you have a solid two-bean blend down, this is where it gets fun. Unique blends come from being deliberate about three things: which beans you pair, what roast levels you mix, and how you balance the cup. Let us take them one at a time.
Experimenting With Bean Combinations
- Mix origins on purpose. Pair coffees from different continents so their strengths do not overlap, a fruity African with an earthy Indonesian, or a nutty Brazilian with a citrusy Central American. Climate, soil, and processing give each origin its own signature, and that contrast is what creates depth.
- Play with bean types. A touch of Robusta (even 10 to 15 percent) adds heavy body, a punchy hit of caffeine, and that thick crema espresso lovers chase. Specialty Arabicas bring the nuance. There is no rule against combining them, and many classic espresso blends do exactly that. The reason different beans taste so different comes down to genetics, growing conditions, and processing, which our guide on why coffee beans taste different breaks down.
Mastering Roast Levels and Their Impact
Roast level is the dial you will reach for most. Here is what each one brings to a blend:
- Light roast. Preserves origin character, bright acidity, fruit, and florals. Use it to add sparkle and lift to a heavier base.
- Medium roast. The diplomat. Balances origin flavor with roast sweetness, caramel and nuttiness, with pleasant body and acidity. Great as a blend’s foundation.
- Dark roast. Smoky, bold, chocolatey, lower in perceived acidity. Use it for body, richness, and that classic “roasty” backbone, especially in espresso blends.
The classic move: pair a light roast (for acidity and aroma) with a dark roast (for body and depth) and let the ratio decide who leads. That single trick covers most of what home blenders want.
Balancing Acidity, Body, and Aroma
Every blend is a negotiation between three things. Learn to taste for each one separately and you can fix almost any cup:
- Acidity. The bright, lively snap, not sourness, think the zip of citrus or green apple. Lighter, washed coffees bring it. If your blend feels dull, add a brighter component.
- Body. The weight and texture on your tongue, from tea-light to syrupy. Indonesians, naturals, and darker roasts add it. If your cup feels thin or watery, lean heavier. (If thinness is a recurring problem, our piece on why coffee tastes watery has the brewing fixes too.)
- Aroma. The smell that hits before the sip, fruity, floral, nutty, chocolatey. Lighter roasts and aromatic origins like Ethiopia carry it. A blend that smells like nothing usually tastes like nothing.
When a blend feels “off,” name which of the three is missing or overpowering, then nudge the ratio toward the bean that supplies it. That is the entire game.
Common Blending Mistakes (and How to Avoid Them)
Most failed home blends fail for the same handful of reasons. Skip these and you are already ahead.
- Scooping instead of weighing. Beans differ in size and density, so “two scoops of each” is not a real ratio. Use a scale and grams. Non-negotiable.
- Blending to hide bad coffee. A stale or low-quality bean does not disappear in a mix, it drags the whole cup down. Start with coffee you would drink solo.
- Changing two things at once. If you tweak the ratio AND the brew at the same time, you will never know what helped. Move one variable per test.
- Too many beans. Five coffees in one blend usually just cancel each other out into mud. Two or three with clear roles beats a crowded committee.
- Pre-grinding a big batch. Ground coffee goes stale fast. Blend whole beans, store them properly, and grind right before you brew.
- Judging on one sip. First impressions lie. Drink the whole cup, and ideally the same blend across a few days, before you decide.
Choosing the Right Brewing Method for Your Blend
You did the work to build a blend, do not let the brew undo it. Different brewing techniques pull out different parts of your coffee, so match the method to what your blend does best.
- Drip coffee: Clean and even-handed, the best showcase for a balanced, medium-roast blend you drink daily.
- Espresso: Concentrates body and intensity. If your blend leans bold and dark, it shines as espresso shots and in milk drinks like lattes and cappuccinos.
- French press: Full immersion that maximizes body and aroma, perfect for a heavier, silkier blend.
| Method | Grind Size | Water Temperature | Extraction Time | Best for Blends |
|---|---|---|---|---|
| Drip Coffee | Medium | 195-205°F (90-96°C) | 2-4 minutes | Well-balanced blends with medium roast |
| Espresso | Fine | 195-205°F (90-96°C) | 25-30 seconds | Blends with bold, complex flavors and dark roasts |
| French Press | Coarse | 195-205°F (90-96°C) | 4 minutes | Blends with full body, aromatic profiles, and medium to dark roasts |
Grinding and Storing Your Custom Blends
Grind size is the lever that makes or breaks extraction. Match it to your method:
- Coarse grind (like sea salt): for French press and cold brew. Slows extraction and keeps the cup clean with minimal sediment.
- Medium grind (like coarse sand): for drip coffee and pour-over. Balanced, forgiving, well-rounded.
- Fine grind (like table salt or finer): for espresso and Aeropress. Fast, full extraction that captures every bit of your blend’s richness.
Storage matters just as much. Air, light, heat, and moisture are coffee’s four enemies. Keep your blend as whole beans in an airtight, opaque container somewhere cool and dark, a pantry shelf, not the windowsill and not the freezer door. Grind only what you are about to brew, and try to use a batch within two to three weeks of roasting for peak flavor.
Pro Tips for a Perfect Cup
- Use good water. Coffee is about 98 percent water, so fresh, filtered water with no off-tastes is half the battle. Heavily chlorinated tap water will tank even a great blend.
- Mind your temperature. Aim for 195 to 205°F (90 to 96°C). Too cool and you get sour under-extraction; too hot and you scorch out bitterness.
- Adjust brew time to taste. Sour and thin means extract longer (finer grind or more time). Bitter and harsh means pull back (coarser grind or less time). Small moves, then taste again.
Frequently Asked Questions
Should I blend coffee before or after roasting?
For home blending, after. Roast (or buy) each coffee at its ideal roast level, then combine the finished beans. Blending before roasting (a “pre-roast blend”) forces beans with different densities to roast at one compromise level, which usually shortchanges at least one of them. Post-roast blending gives you full control over each component.
How many beans should be in a coffee blend?
Start with two and rarely go past three. Each bean should have a clear job, a base for body, a bright coffee for acidity, maybe a third for aroma or a specific note. Pile in too many and they blur together into something muddy instead of complex.
What is a good ratio for a beginner blend?
Begin at 70 percent base coffee to 30 percent accent coffee, by weight, then adjust in 10 percent steps until it tastes right. A 50/50 split is also a fine, balanced starting point when both coffees are equally important to the cup.
Do I need a roaster to make my own blend?
Not at all. You can build excellent blends entirely from store-bought roasted beans, just buy two or three single-origin bags at the roast levels you want and combine them by weight. Home roasting gives you more control, but it is a bonus, not a requirement.
How long does a homemade coffee blend stay fresh?
Whole-bean blends are at their best within two to three weeks of the roast date and stay good for several weeks after if stored airtight, cool, and dark. Once ground, coffee starts losing aroma within minutes, so grind per brew. Only blend as much as you will drink in a couple of weeks.
Now Go Build Your Blend
Here is the honest truth: coffee blending sounds fancy, but it is mostly a scale, two bags of beans you already like, and the patience to taste and tweak. Start at 70/30, write down what you do, change one thing at a time, and you will land on a cup that is unmistakably yours faster than you think.
There are no rules here, only guidelines, so let your own palate be the judge. Once you have a blend you are proud of, do the best thing you can do with it: pour a cup for someone you love, maybe with a little latte art on top, and watch their face when they taste it. That is the whole point. Now go make something good.