How to Clean a Coffee Maker: A Complete Guide for Different Types
Welcome coffee enthusiasts! In this comprehensive blog post, we will guide you through the process of cleaning your coffee maker, ensuring optimal brewing and the best-tasting coffee every time.
Did you know that a dirty coffee maker can significantly affect the flavor of your morning cup of Joe? Over time, mineral deposits, coffee oils, and bacteria can build up in your machine, hindering its performance and impacting the taste of your beloved coffee.
But fear not! With our step-by-step guide, you’ll learn how to clean different types of coffee makers, from standard drip machines to espresso machines, french presses, and even single-serve pod systems. So, grab your favorite mug, and let’s dive into the world of coffee maker maintenance!
Table of Contents
- Five Easy Steps to Clean Your Coffee Maker
- Frequently Asked Questions
- 1. Why is it important to clean a coffee maker regularly?
- 2. How often should I clean my coffee maker?
- 3. What are the steps to clean a drip coffee maker?
- 4. How do I clean a single-serve coffee maker?
- 5. Can I clean a coffee maker with baking soda?
- 6. Are there any alternative cleaning methods?
- 7. Is it safe to clean the coffee maker in a dishwasher?
- Conclusion
Five Easy Steps to Clean Your Coffee Maker
Cleaning your coffee maker may not be the most glamorous task, but it’s essential for maintaining the flavor and longevity of your beloved appliance. By following these five simple steps, you’ll ensure that every cup of coffee you brew is as delicious as the first one:
Step 1: Gather the Necessary Supplies
To begin, gather the necessary supplies for cleaning your coffee maker. You’ll need:
- Distilled white vinegar
- Water
- A clean cloth
- A soft brush or toothbrush
- Soap (mild dish soap is recommended)
Step 2: Clean the Removable Parts
Start by removing any detachable parts of your coffee maker, such as the carafe, filter basket, and lid. These parts can be cleaned separately by washing them with warm soapy water. Rinse them thoroughly and set them aside to dry.
Step 3: Run Vinegar and Water Mixture Through the Machine
Fill the water reservoir of your coffee maker with a mixture of equal parts distilled white vinegar and water. This solution will help remove mineral build-up and remove any lingering residue. Place an empty coffee filter in the filter basket, and start the brewing cycle. Allow the solution to run through the coffee maker until the reservoir is empty.
Step 4: Rinse with Fresh Water
Once the vinegar-water mixture has run through the machine, refill the water reservoir with clean water. Run a complete brewing cycle with just water to rinse out any remaining vinegar. Repeat this step to ensure that all traces of vinegar are removed from the coffee maker.
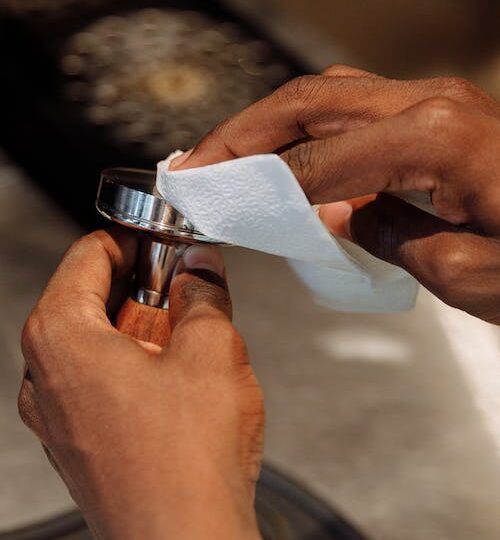
Step 5: Wipe Down the Exterior
Clean the exterior of your coffee maker by dampening a clean cloth with warm soapy water. Gently wipe down the surface, paying extra attention to any areas that may have accumulated dust or grime. Dry the exterior with a soft, dry cloth to prevent any moisture from entering the internal components.
By following these five steps regularly, your coffee maker will not only produce better-tasting coffee but also have a longer lifespan. Don’t let neglecting the cleaning process ruin your morning routine. Take a few moments to maintain your coffee maker, and you’ll be rewarded with a fresh and flavorful brew every time!
Frequently Asked Questions
1. Why is it important to clean a coffee maker regularly?
Cleaning your coffee maker regularly is crucial to maintain the best tasting coffee. Over time, mineral deposits, oils, and coffee residue can build up, affecting the flavor and quality of your brew. By cleaning your coffee maker, you ensure a cleaner and more efficient brewing process, resulting in a better cup of coffee.
2. How often should I clean my coffee maker?
To keep your coffee maker in top shape, it is recommended to clean it at least once a month. However, if you use your coffee maker frequently or notice any changes in taste or performance, it’s a good idea to clean it more often.
3. What are the steps to clean a drip coffee maker?
- First, remove any remaining coffee grounds from the filter basket.
- Mix a solution of equal parts water and vinegar and pour it into the water reservoir.
- Place a clean filter in the basket and start a brew cycle. Allow half of the solution to brew and then pause the cycle, letting it sit for about 15 minutes to clean the internal components.
- Resume the brew cycle and let it finish.
- Run two additional brewing cycles with just water to rinse out any vinegar residue.
- Finally, wash the removable parts, such as the filter basket and carafe, with warm soapy water.
4. How do I clean a single-serve coffee maker?
For single-serve coffee makers, such as pod-based machines, the cleaning process is slightly different:
- Remove any remaining coffee pods from the machine.
- Mix a solution of water and descaling solution according to the manufacturer’s instructions.
- Run a brew cycle without any pods, using the solution.
- Flush the machine by running two additional brew cycles with just water.
- Wash the removable parts, such as the pod holder, with warm soapy water.
5. Can I clean a coffee maker with baking soda?
Yes, you can use baking soda to clean your coffee maker. It helps remove stains and odors. Mix a solution of water and baking soda, and use it to scrub the interior of the coffee maker. Rinse thoroughly afterward to remove any residue.
6. Are there any alternative cleaning methods?
Yes, some alternative cleaning methods include using citric acid or white vinegar instead of descaling solution. You can also use specialized coffee maker cleaning tablets or follow the manufacturer’s recommended cleaning products.
7. Is it safe to clean the coffee maker in a dishwasher?
No, it is not recommended to clean your coffee maker in a dishwasher. The heat and harsh detergents in the dishwasher can damage the internal components and affect the taste of your coffee. Always refer to the manufacturer’s instructions for proper cleaning methods.
Conclusion
By following these steps regularly, your coffee maker will not only produce better-tasting coffee but also have a longer lifespan. So, don’t hesitate; let your thoughts flow and join the conversation. We can’t wait to hear from you!


