Essential Coffee Accessories Every Home Barista Needs
You bought the fancy beans. You watched the YouTube videos. And yet your morning cup still tastes like it’s apologizing for something. Here’s the not-so-secret truth: the machine matters less than the little army of tools sitting next to it. The right accessories are the difference between “eh, it’s coffee” and “wait, did I just make that?” Below, you’ll get the nine pieces of gear that genuinely move the needle, why each one earns its counter space, and exactly where to save versus where to splurge. No fluff, no gatekeeping. Let’s stock your bar.
1. A Burr Grinder (Yes, This One Is Non-Negotiable)
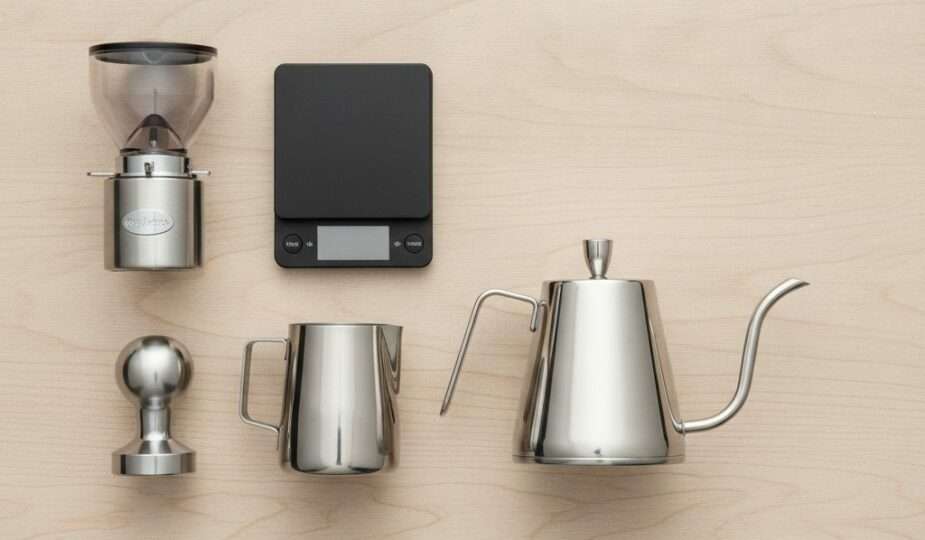
If you buy exactly one thing on this list, make it a burr grinder. Blade grinders chop beans into a chaotic mix of boulders and dust, which brews unevenly and tastes both bitter and sour at the same time. Impressive, honestly, but not in a good way. Burr grinders crush beans between two abrasive surfaces to a consistent particle size, and consistency is the whole ballgame.
Grind size changes everything: coarse like sea salt for a French press, medium like table salt for pour-over and drip, and fine like powdered sugar for espresso. A blade grinder simply can’t give you those distinctions reliably.
- Budget: A solid manual hand grinder gets you genuinely good results for around $40 to $100. Your arm gets a workout, but the cup is excellent.
- Splurge: An electric flat-burr or conical-burr grinder ($150 and up) saves your wrist and dials in espresso fineness with stepless precision.
Want to compare specific models before you commit? Our roundup of the best coffee grinders breaks down the worthy contenders at every price point.
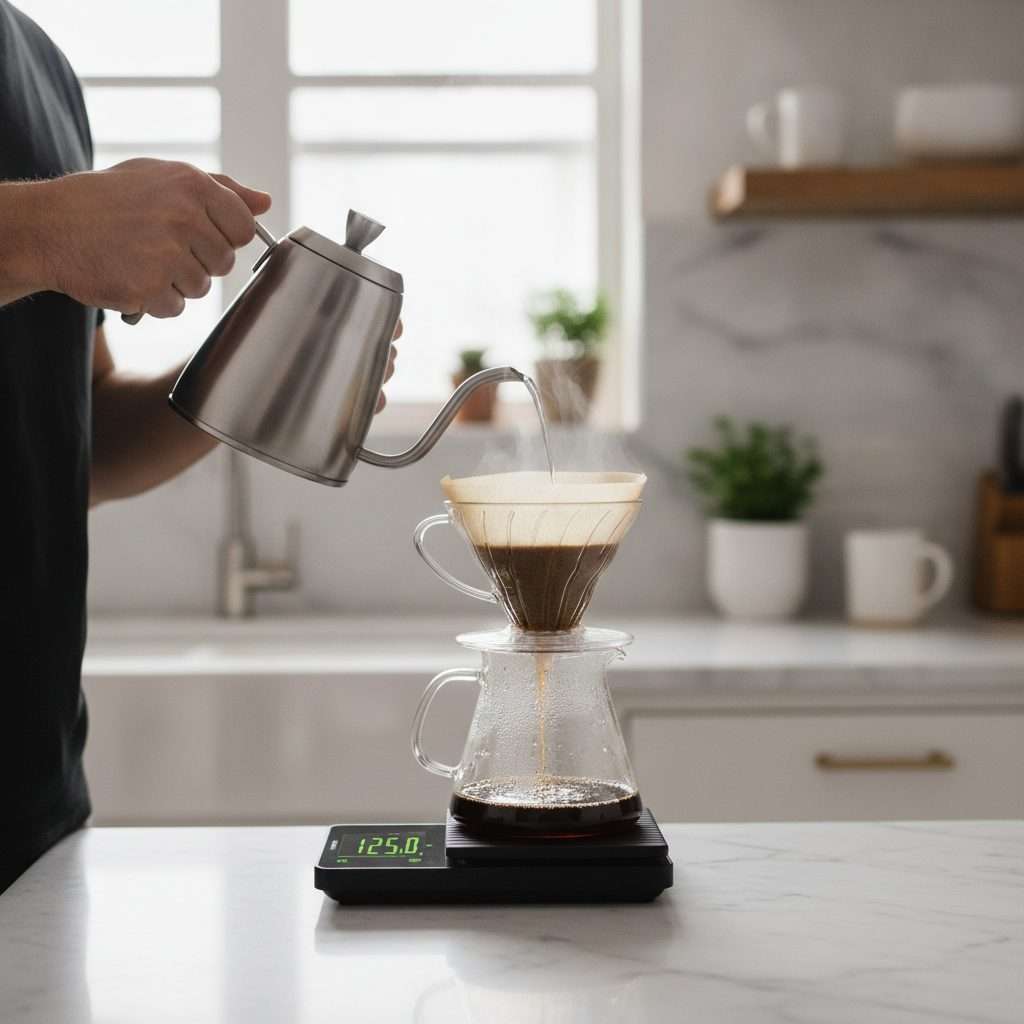
2. A Digital Scale (Eyeballing Is a Lie We Tell Ourselves)
Coffee is a recipe, and recipes need measurements. Scooping by volume is wildly inconsistent because beans vary in density, so a “scoop” of light roast weighs more than the same scoop of dark. A scale fixes that instantly.
The gold-standard starting ratio is 1 gram of coffee to 16 grams of water (1:16). Want it bolder? Move toward 1:15. Lighter? Slide to 1:17. Once you weigh, you can repeat your best cups on purpose instead of by accident. If dialing in flavor is your goal, here’s how to adjust coffee strength without guesswork.
- Budget: Any kitchen scale with 0.1-gram resolution and a tare button works fine for around $15 to $25.
- Splurge: A dedicated coffee scale with a built-in timer and fast response keeps your pour-over and espresso on rhythm. See our picks for the best coffee scales.
3. A Gooseneck Kettle (Control You Can Actually Feel)
For pour-over, your kettle is basically your paintbrush. A standard kettle dumps water in an uncontrollable gush; a gooseneck’s long, narrow spout lets you pour a slow, steady, pencil-thin stream exactly where you want it. That control means even saturation and no dry pockets of grounds sulking in the corner.
Temperature matters too. The sweet spot for most coffee is 195 to 205 degrees Fahrenheit (90 to 96 degrees Celsius). Too hot scorches the grounds into bitterness; too cool and you get a flat, sour, underdeveloped cup.
- Budget: A stovetop gooseneck (around $30 to $40) does the job; just pair it with a thermometer.
- Splurge: A variable-temperature electric gooseneck ($80 to $150) holds your exact target temp to the degree and often includes a built-in timer.
New to the technique? Walk through it with our guide on how to make the perfect pour-over at home.
4. A Tamper (For the Espresso Crowd)
If you’re pulling espresso, a proper tamper is essential. Its job is to compress the ground coffee in the portafilter into a level, uniform puck so pressurized water flows evenly instead of blasting through a weak spot. That weak-spot blast is called channeling, and it’s the villain behind most sour, watery shots.
Match the tamper diameter to your basket. Most home machines use a 58mm basket, but check yours before buying. Tamp with firm, level pressure (you don’t need to bench-press it) and keep your wrist straight to avoid a tilted puck.
- Budget: A flat stainless tamper in the correct size runs about $15 to $25.
- Splurge: A calibrated or spring-loaded tamper clicks at a consistent pressure, so every puck is identical.
5. A Distribution Tool (The Quiet Hero)
This one feels optional until you try it, and then you can’t go back. A distribution tool (also called a leveler) spins gently across the grounds before tamping to break up clumps and even out the bed. Combined with a good tamp, it dramatically reduces channeling and gives you more even extraction shot after shot.
- Budget: A simple needle-style WDT tool (a cluster of fine needles you stir through the grounds) costs around $10 to $20 and works beautifully.
- Splurge: An adjustable-depth spinning distributor that matches your basket and doubles as a leveler.
For the full workflow from dose to extraction, see our ultimate guide to making espresso at home.
6. A Milk Pitcher (Latte Dreams Start Here)
If milk drinks are your love language, a stainless steel steaming pitcher is the tool that makes velvety microfoam possible. Its shape and spout let you swirl, control the pour, and eventually create latte art instead of a sad foam blob.
- Size it to your habit: a 12 oz (350 ml) pitcher suits single drinks, while a 20 oz (600 ml) handles two or bigger lattes.
- Steam to about 140 to 150 degrees Fahrenheit (60 to 65 degrees Celsius), which is hot to the touch but not scalding, for the sweetest milk.
No steam wand? You can still get great foam; here’s how to froth milk without a frother. And once you’ve got that silky texture, try our latte art tips and techniques to show off a little.
7. An Airtight Storage Canister (Protect Your Investment)
You paid good money for fresh beans, so don’t let them go stale in the bag. Coffee’s four enemies are oxygen, light, heat, and moisture. An opaque, airtight canister keeps all four out and preserves flavor and aroma far longer than a clipped-open bag.
Store beans whole and at room temperature in a cool, dark cupboard, and grind only what you need right before brewing. And please skip the freezer-door routine for your daily beans; the temperature swings invite condensation, which is moisture, which is enemy number four.
- Budget: A ceramic or stainless canister with a silicone-sealed lid keeps light and air out for around $15 to $25.
- Splurge: A vacuum-sealing or one-way-valve canister actively pulls air out for maximum freshness.
For the deeper dive, read how to properly store coffee beans, and compare options in our best coffee storage containers guide.
8. A Cleaning Brush (Boring, Essential, Non-Optional)
Coffee leaves behind oils that turn rancid, and rancid oil tastes exactly as charming as it sounds. A small brush keeps your grinder, group head, and portafilter free of stale buildup that quietly ruins every cup.
- Brush out your grinder’s burr chamber regularly to clear old grounds, especially when switching roasts.
- For espresso machines, dry-brush the group head daily and run a backflush with espresso machine cleaner roughly weekly, depending on use.
This is a pure budget hero: a quality brush costs under $15 and pays for itself in better-tasting coffee and longer-lasting equipment.
9. A Thermometer (If Your Kettle Doesn’t Have One)
Remember that 195-to-205-degree sweet spot? A thermometer is how you hit it without guessing. If you’ve got a basic stovetop kettle, a clip-on or instant-read thermometer is the cheap insurance policy that keeps your water from torching or under-extracting your grounds.
- Budget: An instant-read digital thermometer (around $10 to $15) reads in seconds.
- Splurge: Skip the separate thermometer entirely by upgrading to a variable-temperature electric kettle that holds your target temp for you.
Where to Start If You Can’t Buy Everything at Once
Don’t panic-buy the whole list this weekend. Here’s a sane order of priority for any brew method:
- Burr grinder first, always. It’s the single biggest upgrade to your cup.
- Digital scale next, so you can actually repeat your wins.
- Gooseneck kettle and thermometer if you brew pour-over, or a tamper and distribution tool if you pull espresso.
- Storage canister and cleaning brush to protect everything you just bought.
- Milk pitcher last, when you’re ready to play barista with foam.
Pairing the right gear with the right beans seals the deal; brush up on selecting the perfect coffee beans before your next order.
Frequently Asked Questions
What is the single most important coffee accessory to buy first?
A burr grinder, no contest. Consistent grind size is the foundation of even extraction, and a good grinder will improve your coffee more than almost any other upgrade, including a pricier machine.
Do I really need a scale, or can I just use a coffee scoop?
You really need a scale. Beans vary in density, so scooping by volume gives inconsistent results. Weighing to a ratio like 1:16 lets you brew the same great cup every single time instead of rolling the dice.
What water temperature should I use for brewing coffee?
Aim for 195 to 205 degrees Fahrenheit (90 to 96 degrees Celsius). Too hot scorches the grounds and tastes bitter; too cool leaves the coffee flat and sour. A thermometer or variable-temperature kettle keeps you in range.
Are expensive accessories worth it, or are budget versions fine?
Budget versions of most tools work great, especially scales, tampers, distribution tools, and brushes. Splurging pays off most on grinders and kettles, where precision and convenience genuinely improve daily results.
How do I keep my coffee fresh after opening the bag?
Store whole beans in an opaque, airtight canister in a cool, dark cupboard, away from oxygen, light, heat, and moisture. Grind right before brewing, and skip the freezer for daily beans to avoid condensation.
Build your bar one tool at a time, and you’ll feel the difference in the cup almost immediately. Start with the grinder and scale, add the rest as your habits grow, and before long you’ll be the friend everyone wants brewing on a Sunday morning. Now go make something delicious. You’ve absolutely got this.