Best Coffee for Camping: Brewing Methods for Outdoors
Here is the cold truth nobody warns you about: the worst cup of coffee you will ever drink is the one you make at 6 a.m. on a campsite, with half-frozen fingers, lake water, and a fistful of gas-station grounds. And the best cup you will ever drink? Also that one — if you pack the right gear and know the three or four numbers that actually matter. Same sunrise, wildly different morning. This guide is about landing on the right side of that line.
You are going to leave here knowing which camping coffee makers are worth the pack weight, the exact coffee-to-water ratios and grind sizes for each one, how to handle water and temperature when you do not have a kitchen, the mistakes that quietly ruin trailside coffee, and a no-equipment cold-brew trick that does the work while you sleep. No flowchart required. Let’s get into it.
Best Coffee Brewing Methods for Camping
Before you fall in love with a fancy brewer, ask the only two questions that matter on a trip: how much weight are you carrying, and how many people are you caffeinating? A solo backpacker counting grams wants something different from a family rolling up to a car-camping site with a full cooler. Match the method to the trip and you will never resent your coffee setup again.
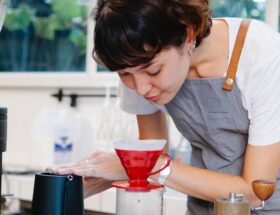
1. Choosing the Right Camping Coffee Maker
When it comes to brewing coffee outdoors, the right equipment is the whole ballgame. Here are the methods worth your pack space, and the honest trade-offs for each:
- AeroPress: The backpacker’s darling, and for good reason. Lightweight, nearly indestructible (it’s plastic — drop it, step on it, it shrugs), and it brews a clean, low-acidity cup in about a minute. Best for one to two cups at a time. If you only buy one thing, buy this.
- Manual K-Cup Press: If you live and die by K-Cup pods, a hand-pump press lets you use them off-grid with no electricity. Convenient and idiot-proof. The catch: pods are bulky, create trash you have to pack out, and the coffee is rarely as good as fresh grounds. Great for “I just want caffeine, not a ceremony” mornings.
- Percolator Pot: The classic campfire workhorse and a car-camper favorite, because it makes a lot of coffee at once — perfect for a crowd. It’s also the easiest method to overcook into something bitter, so watch it like a hawk (more on that below). Nostalgic, sturdy, forgiving on gear, demanding on attention.
- Moka Pot: Want espresso-adjacent intensity over a camp stove? A Moka pot uses steam pressure to push out a rich, concentrated brew. Stovetop only — it needs a flat, steady burner, so it’s better for car camping than a wobbly backpacking stove.
- Nanopresso: A genuine portable espresso maker that pulls a real pressurized shot, crema and all. It’s the splurge pick for the coffee nerd who refuses to compromise. Small, a touch fiddly, and it makes one shot at a time — but oh, what a shot.
Not sure which style suits your taste before you ever hit the trail? Our breakdown of which coffee maker makes the best-tasting coffee is a useful gut-check on the flavor each method delivers.
2. Setting Up Your Brewing Station
Find a stable, level surface first — a flat rock, a picnic table, the tailgate. A tippy brewer is how you end up wearing your coffee. Then gather your supplies before you light anything, because fumbling for a filter mid-brew is a recipe for cold, sad coffee:
- Clean water (filtered or treated — see the next point)
- Whole beans or pre-ground coffee, sealed airtight
- A grinder, if you’re bringing whole beans
- Filters, if your method needs them (AeroPress, some drippers)
- An insulated mug or thermos — outdoor air steals heat fast
- A heat source: camp stove, portable gas burner, or campfire
About that water — it matters more than your beans. Coffee is roughly 98% water, so if your water tastes off, your coffee will too. Use filtered or properly treated water, never untreated stream or lake water. And don’t brew with water that’s been sitting boiling forever; over-boiled water goes flat and so does the cup it makes.
3. Grind Your Coffee (If Using Whole Beans)
Here’s the thing about grinding fresh: ground coffee starts losing its best aromatics within minutes, so beans you grind at the site genuinely taste brighter than the pre-ground bag you opened three days ago. A hand grinder adds a little weight but earns its keep. If you’d rather pre-grind at home, do it the morning you leave and seal it tight — and read up on how to properly store coffee beans so they survive the trip.
Whichever route you choose, grind size has to match your method — this is the number-one lever for taste, full stop:
- AeroPress: medium-fine, like table salt. (Going finer makes a stronger, espresso-ish cup but takes more muscle to press.)
- Percolator and Moka pot: medium to medium-coarse for the percolator; fine-but-not-powdery for the Moka pot. Too fine in either and you invite bitterness and clogging.
- Nanopresso: fine, espresso grind — this is non-negotiable for real pressure and crema.
- Cold brew (see below): coarse, like raw sugar or breadcrumbs.
Grind too fine for the method and you over-extract — that’s where the harsh, ashy bitterness comes from. If your camp coffee always tastes like a punishment, start here; our guide to the 9 reasons your coffee is bitter walks through every culprit.
4. Begin Brewing
Now the fun part. A reliable starting point for almost any method is a 1:16 ratio — about 1 gram of coffee to 16 grams of water, or roughly 2 tablespoons of grounds per 6 ounces of water. No scale? Two heaping tablespoons per mug is a fine field measurement. Want it stronger, nudge toward 1:15; weaker, toward 1:17. Aim your water temperature for 195–205°F (90–96°C) — if you boiled it, pull it off the heat and count to thirty before you pour. Boiling water poured straight onto grounds scorches them.
AeroPress
- Insert a paper filter into the cap and screw it onto the AeroPress.
- Set the AeroPress on top of a sturdy mug or thermos.
- Add about 17 grams (2 scoops) of medium-fine grounds, then pour in around 250 ml of hot water.
- Stir for 10 seconds so every ground gets wet.
- Insert the plunger and press slowly and steadily — aim for about 20–30 seconds. If it presses with zero resistance, your grind is too coarse; if you’re fighting it, too fine.
Want the full deep dive on technique, including the inverted method? Our complete AeroPress guide has you covered.
Manual K-Cup Press
- Open the K-Cup holder and insert your preferred pod into the chamber.
- Position your mug or thermos under the press.
- Fill the water reservoir with hot water.
- Pump the handle steadily to push water through and extract the coffee. Pack out the spent pod — leave no trace.
Percolator Pot
- Add water to the bottom chamber — about 1 tablespoon of medium-coarse grounds per cup of water.
- Place your grounds into the basket and assemble the pot tightly.
- Set it on the heat and bring it to a gentle boil.
- Once it starts percolating (you’ll see coffee jumping in the little glass knob), drop the heat and let it perk for just 5–7 minutes. This is where most people go wrong: longer is not stronger, it’s just bitter.
- Pull it off the heat the moment time’s up and serve.
Moka Pot
- Fill the lower chamber of the Moka pot with hot water, up to just below the safety valve. (Starting with hot water keeps the grounds from stewing.)
- Insert the filter basket and fill it with fine grounds — level, not packed.
- Screw the top chamber on tightly and set it on medium-low heat, lid open.
- Watch for the coffee to flow up. When it turns from a steady stream to a pale, sputtering gurgle, it’s done.
- Pull it off the heat immediately — wrapping the base in a damp cloth stops the brew fast and prevents that burnt note. Pour and enjoy.
Nanopresso
- Remove the cup and detach the cap.
- Add fine, espresso-grind coffee to the filter basket and level it off.
- Screw the cap back on and flip the Nanopresso over.
- Pour hot water into the water chamber and attach it.
- Pump several times — the first few pumps build pressure, then the shot starts flowing.
- Enjoy a genuine espresso shot, crema and all, in the middle of nowhere.
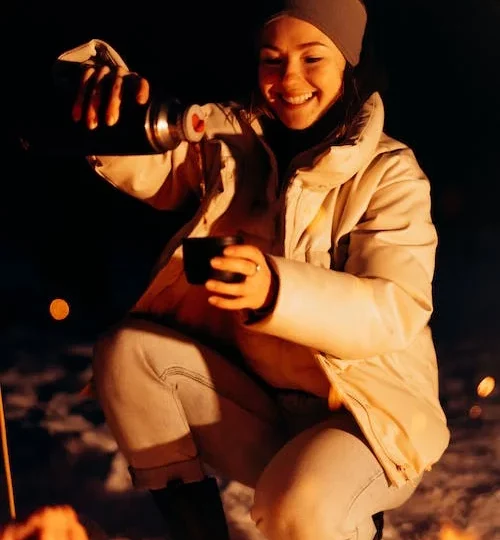
No Stove, No Problem: Camp Cold Brew
Here’s my favorite trick for backcountry mornings where firing up a stove pre-coffee feels like cruel and unusual punishment: make it the night before. Cold brew needs zero heat, zero electricity, and almost no attention.
- The night before, add coarse-ground coffee to a clean jar, bottle, or sealable bag at roughly a 1:8 ratio for concentrate (1 part coffee to 8 parts cold, clean water).
- Stir, seal, and let it steep 12 to 18 hours — tuck it in your bag or a cool spot overnight.
- In the morning, strain through a filter, a clean bandana, or a fine mesh.
- Dilute the concentrate with water to taste, or pour it over the last ice in your cooler.
It’s smooth, low-acid, and waiting for you the second you unzip the tent. Want to play with flavors and iced variations back home? Steal ideas from our DIY iced coffee recipes.
Common Camping Coffee Mistakes to Avoid
- Pouring boiling water on the grounds. Let it rest 30 seconds off the boil. Scorched coffee is bitter coffee.
- Over-percolating. Five to seven minutes, then off the heat. Walking away is how good coffee dies.
- Wrong grind for the method. Fine grind in a percolator equals silt and bitterness; coarse grind in a Nanopresso equals sad, weak water.
- Guessing wildly on ratio. Two tablespoons per mug is your anchor. Then adjust — but adjust on purpose.
- Lousy water. If you wouldn’t drink it straight, don’t brew with it. Filter or treat first. A little sweetness off and the whole cup suffers — here’s the secret to sweeter coffee if yours runs harsh.
Did you know that coffee was first discovered by goats? Legend has it that a goatherd in Ethiopia noticed his goats becoming hyperactive after eating the berries from a certain tree. He decided to try the berries for himself and discovered the stimulating effects of coffee. This led to the discovery of coffee and eventually to the various brewing methods we use today.
5. Clean Up and Pack Up
When the coffee’s gone, clean your equipment properly. Scatter used grounds well away from camp and water sources, or — better yet — pack them out (they’re great compost back home, and they won’t lure critters into your tent). Rinse everything with clean water, wipe it down, and let it dry fully before packing so nothing molds or holds onto stale oils. Stash any leftover beans or coffee grounds in an airtight, sealed container.
Do all that and you’ll be sipping something genuinely good while the rest of the campsite is still squinting at the sunrise. For the full picture on dialing in your setup, our comprehensive guide to brewing coffee while camping and our notes on outdoor brewing methods go even deeper. Pack your method of choice on your next camping trip and don’t look back.
Frequently Asked Questions
What is the best coffee brewing method for backpacking?
For ultralight backpacking, the AeroPress is hard to beat — it’s light, nearly unbreakable, brews in about a minute, and cleans up with a single push. If you’re counting every gram, instant specialty coffee or pre-made cold brew skips the gear entirely. Car campers with room to spare can lean into a percolator or Moka pot for a richer cup.
How much coffee should I use per cup when camping?
Start at roughly 2 tablespoons of grounds per 6 ounces of water (about a 1:16 ratio). Want it bolder, use 1:15; lighter, use 1:17. Cold brew concentrate runs stronger at about 1:8, then you dilute it to taste in the morning.
Can I brew camping coffee with lake or stream water?
Not without treating it first. Always filter, boil, or chemically treat wild water before brewing — coffee is about 98% water, so untreated sources risk both your stomach and your flavor. Treated or filtered water makes a noticeably cleaner cup.
Should I grind coffee before the trip or at camp?
Grinding at camp tastes brighter because ground coffee loses aromatics fast, so a small hand grinder is a worthy add to your kit. If you’d rather pre-grind, do it the morning you leave, match the grind to your brewer, and seal it airtight. Learn how to store coffee beans properly so they hold up.
How do I keep camp coffee hot?
Brew straight into an insulated, double-walled mug or a thermos, and pre-warm it with a splash of hot water first. Outdoor air pulls heat fast, especially at altitude, so the vessel matters as much as the brew. A thermos will hold a second cup hot for hours.
Wrap Up
Camp coffee isn’t complicated — it’s just a few good decisions made before you’re cold and under-caffeinated. Pick the method that fits your trip: the AeroPress for light-and-easy, a percolator when you’re feeding a crowd, a Moka pot or Nanopresso when you want intensity, a manual K-Cup press for pure convenience, and overnight cold brew for the mornings you can’t be trusted with a stove.
Then nail the fundamentals — clean water, the right grind, a 1:16 ratio, water just off the boil, and the discipline to not over-cook it. Experiment with different grounds and beans until you find your combination, pack your filters and grinder, and go. A great cup outdoors is the kind of small luxury that makes the whole trip feel a little more like home. Now go brew somebody you love a cup by the fire.