The Science of Coffee Roasting: How Temperature and Time Impact Flavor
Two batches of the exact same beans can taste like two different drinks. One is bright and lemony; the other is flat and ashy. The beans didn’t change. The roast did. Roasting is just heat applied over time, but the way you control those two dials is the difference between a cup you crave and one you choke down. Let’s get into how it actually works, and how that knowledge makes your morning coffee better starting tomorrow.
Here’s the short version before we go deep: roasting drives moisture out of green coffee beans, then triggers two flavor-building chemical reactions, the Maillard reaction and caramelization. Get the heat and timing right and you unlock sweetness, body, and aroma. Push too far and you trade all of that for bitter and burnt. That’s the whole game.
Table of Contents
- What Roasting Actually Does to a Coffee Bean
- The Role of Temperature: Your First Dial
- The Role of Time: Your Second Dial
- Flavor Profiling: Where Temperature and Time Meet the Cup
- From Roast to Cup: Brewing It Right at Home
- Keep Your Beans Fresh (Don’t Waste the Roast)
- Roast Meets Brew: Matching Your Method to the Beans
- Quick Answers: Coffee Roasting FAQ
- The Two Dials That Run the Whole Show
What Roasting Actually Does to a Coffee Bean
Roasting is the step that turns hard, grassy green coffee beans into something you’d actually want to drink. It’s the pivot point of coffee production, where the bean’s raw potential either gets developed or wasted. And whether you end up with a light, medium, or dark roast comes down to where you choose to stop. Let’s walk the bean’s journey from seed to roast.
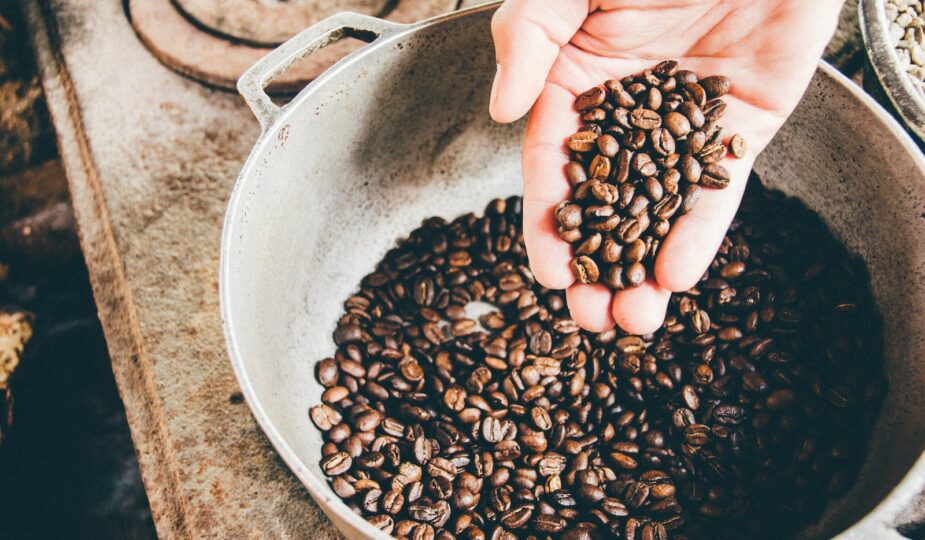
Start With the Green Bean
Green coffee beans are the raw, unroasted seeds of the coffee cherry, and they’re packed with everything your future cup will taste like. Origin, altitude, variety, and processing all load the bean with potential. Roasting is how you cash it in.
A few things worth knowing about green beans:
- They’re dense and grassy. Bite one and you’ll get vegetal, hay-like notes. Nothing coffee-ish yet.
- They hold roughly 8 to 12 percent moisture. That water is the first thing the roast has to deal with, and it’s why the early minutes are all about drying.
- They store well. Kept cool and dry, green beans stay usable for a year or more, which is why coffee ships green and gets roasted close to where it’s sold.
Heat, Time, and the Chemistry Behind the Flavor
The entire craft of coffee roasting comes down to managing two dials: how hot, and for how long. Those two control the Maillard reaction and caramelization, the reactions that build the deep, layered flavors you recognize as coffee.
Watch a bean through a roast and you’ll see it move through clear stages:
- Yellowing (drying): Moisture cooks off and the bean shifts from green to pale yellow, smelling like toast or popcorn.
- First crack: Around 196°C (385°F), trapped steam and gas blow the bean open with an audible pop, like popcorn. Stop here-ish and you’ve got a light roast.
- Development: The window after first crack where flavor builds. This is where roasters spend their attention.
- Second crack: A quieter, crackle-like snap around 224°C (435°F) as the bean’s structure breaks down further. You’re now in medium-dark to dark territory.
The longer and hotter you go past first crack, the darker, bolder, and more bitter the result. The shorter and gentler, the brighter and more acidic.
Light, Medium, Dark: What Each One Tastes Like
Roast level isn’t about strength (that’s a brewing thing). It’s about flavor character, and each level has a personality:
- Light roast: Stopped at or just after first crack. Keeps the most origin character, with bright acidity and floral, fruity, tea-like notes. Tastes like where the coffee came from.
- Medium roast: Carried a bit further. Balances origin notes with roast-driven sweetness; think caramel, nuts, and a rounder body.
- Dark roast: Taken to or past second crack. Origin flavors fade and roast flavors take over: smoky, bittersweet, chocolatey, full-bodied. Tastes like the roast, not the farm.
Quick fact that surprises people: lighter roasts actually have slightly more caffeine by weight than dark roasts, because the longer roast burns off a touch of mass. The difference is small, but the “dark roast is stronger” myth is exactly that, a myth.
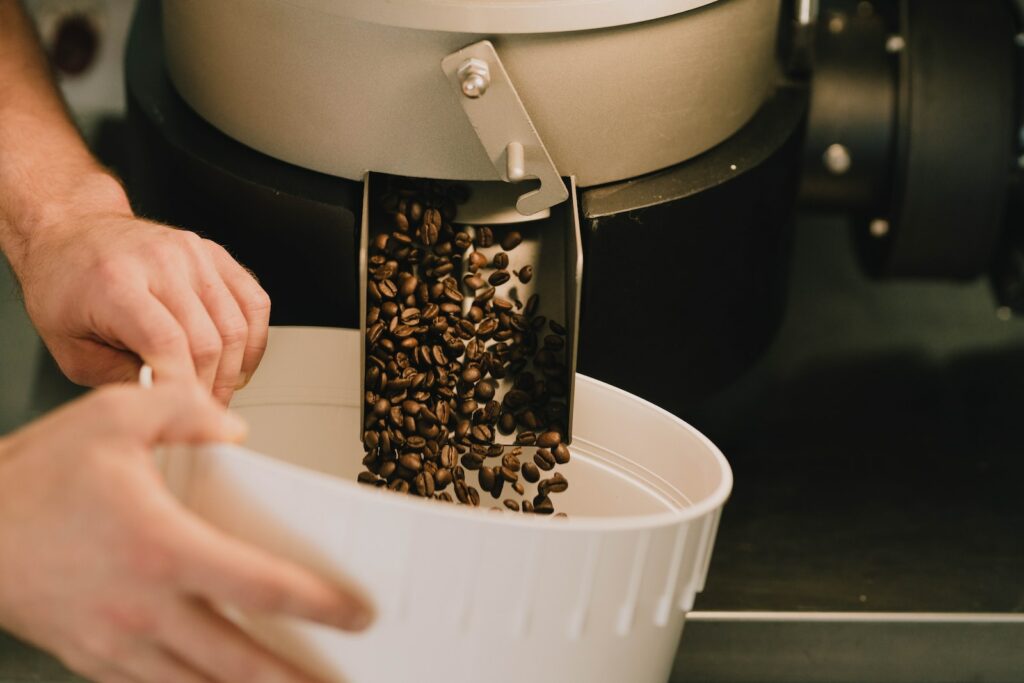
Why Cooling Fast Is Non-Negotiable
The instant beans hit your target, they have to cool, fast. Commercial roasters dump beans onto a perforated cooling tray with a fan and stir them until they’re at room temperature, usually within three to four minutes. Drag your feet and residual heat keeps roasting the beans (this is called “baking” or “stalling”), flattening flavor and pushing toward bitter and burnt. Cool quick, lock in the flavor you worked for.
Here’s how the roast levels stack up at a glance:
| Roast Level | Temperature Range | Roasting Time | Flavor Characteristics |
|---|---|---|---|
| Light Roast | 350°F – 400°F (177°C – 204°C) | 8 – 10 minutes | Bright, floral, citrus, tea-like notes |
| Medium Roast | 400°F – 430°F (204°C – 221°C) | 10 – 12 minutes | Balanced, nutty, fruity, caramel |
| Medium-Dark Roast | 430°F – 450°F (221°C – 232°C) | 12 – 14 minutes | Rich, chocolate, toasty, slight acidity |
| Dark Roast | 450°F+ (232°C+) | 14+ minutes | Bold, smoky, bitter, full-bodied |
The Role of Temperature: Your First Dial
Temperature is the dial that decides how aggressively flavor develops. Too gentle and the roast stalls into a baked, papery cup. Too aggressive and you scorch the outside before the inside catches up. Here’s how it plays out across the roast.
The Charge: Where the Beans Go In
Green beans hit the roaster at room temperature, around 70°F (21°C), but the drum itself is preheated, often to 350 to 400°F (177 to 204°C), so heat transfers immediately. The first job is the drying stage: driving off that 8 to 12 percent moisture without scorching the bean. Push heat too hard here and you tip the bean (scorch it); too soft and the roast stalls. This stage usually runs the first few minutes and sets the foundation for everything after.
Roast Profiles: The Roaster’s Game Plan
A roast profile is a planned temperature curve from charge to drop, designed to hit specific flavors. It’s the recipe. Roasters track bean temperature and “rate of rise” (how fast the temperature climbs each moment) and nudge the heat to keep the curve on track.
Two profiles, two outcomes:
- Bright, light-roast profile: Steady drying, then a brisk climb into first crack, with a short development time afterward to preserve acidity and floral notes.
- Bold, dark-roast profile: A longer, hotter finish that pushes through and past second crack to build smoky, bittersweet depth.
The “development time ratio” (the share of the total roast spent after first crack) is the lever pros obsess over. Roughly 15 to 25 percent is a common target; too little tastes grassy and sour, too much tastes flat and roasty.
First Crack and Second Crack: Listen for the Roast
The cracks are your audible roadmap. First crack lands around 380°F (193°C), when the bean expands and releases steam in a loud pop. Second crack arrives around 430°F (221°C), a finer, snappier sound, signaling you’re entering dark-roast territory.
What you do at first crack decides your roast level:
- Drop the beans shortly after first crack for a light roast.
- Let them ride a little longer for a medium roast.
- Carry them toward or into second crack for dark.
One rule that saves a lot of ruined batches: never walk away during first crack. The roast accelerates fast here, and a distracted 30 seconds can take you from a medium you wanted to a dark you didn’t.
The Drop: Final Temperature and Cooling
The moment you hit target, you “drop” the beans and cool them immediately. Final bean temperature tracks roast level: a light roast typically drops around 400 to 415°F (204 to 213°C), while darker roasts run beyond 440°F (227°C). Beans are delicate at this point; leave them in the hot drum and they overcook in seconds. Drop on time, cool fast, done.
The Role of Time: Your Second Dial
Temperature gets the attention, but time is its partner in everything. The same target temperature reached in 9 minutes versus 16 minutes gives you two completely different cups. Here’s why.
How Roast Time Shapes Flavor
Total roast time is a flavor lever in its own right:
- Faster roasts (closer to 9 to 11 minutes) tend to preserve brightness, acidity, and delicate aromatics.
- Slower roasts (13 to 16 minutes) build more body and sweetness but risk going flat and baked if you stall.
The interval between first and second crack is the make-or-break stretch. Stretch it out and you head toward a developed medium; rush it and you drop into a quick dark. Most home and small-batch roasts land somewhere in the 10 to 15 minute range total, but the clock only matters in concert with the temperature curve.
The Maillard Reaction, Explained Simply
The Maillard reaction is the same browning chemistry that makes seared steak and toasted bread taste so good. It’s a reaction between amino acids and reducing sugars under heat, and in coffee it generates hundreds of aroma and flavor compounds, from caramel to chocolate to roasted nut. In coffee roasting it dominates roughly the 285 to 355°F (140 to 180°C) window, right before first crack.
The takeaway for flavor: how long beans linger in that Maillard window directly shapes sweetness and depth. Rush through it and the cup tastes thin and sharp; give it enough time and you build the rich, rounded notes people love. Caramelization (sugars breaking down) kicks in at higher temperatures and adds its own sweetness and, eventually, bitterness if pushed too far.
Finding the Sweet Spot for Each Bean
Every bean has its own ideal balance of time and temperature, and chasing it is where roasting becomes part science, part feel. The variables that move the sweet spot:
- Origin and variety: different beans want different curves.
- Altitude: high-grown beans are denser and generally need more energy to develop.
- Moisture content: wetter beans need a longer drying phase.
- Batch size: bigger loads shift heat behavior and timing.
This is why roasters keep notes and run the same coffee multiple times, tweaking one variable at a time. Time and temperature aren’t separate dials so much as two hands on the same wheel.
Flavor Profiling: Where Temperature and Time Meet the Cup
Profiling is where a roaster decides what they want the coffee to taste like, then uses heat and time to get there. Here’s how the two dials translate into flavor on your tongue.
How Temperature Steers Flavor
Where you stop the roast does most of the heavy lifting on flavor:
- Lower drop temperatures (light): retain origin character, with bright acidity and floral, fruity notes.
- Mid-range (medium): balance origin with caramel sweetness and a fuller body.
- Higher (dark): trade origin for smoky, bittersweet, bold roast flavor and a heavy body.
How Time Fine-Tunes It
Time is the fine-tuning knob over the top of temperature. A quicker development phase tends to lift acidity and floral high notes; a longer one deepens body and rounds out sweetness. The “right” balance shifts with every bean, which is exactly why two roasters can take the same green coffee and produce two distinct, both-delicious cups. It also explains why coffee beans taste so different from bag to bag.
The Art of Blending
Roasters don’t always stop at single origins. Blending lets them combine beans, each roasted to its best profile, into something more complete than any one bean alone, say, a bright Kenyan for acidity, a Brazilian for chocolatey body, and an Ethiopian for floral lift. The goal is balance: acidity, body, and aroma working together instead of fighting.
Use This as a Drinker
You don’t need a roaster to put this to work. Next time you buy beans, read the roast level and tasting notes and match them to your mood: light for bright and fruity, dark for bold and cozy, medium when you can’t decide. Buy two roast levels of the same origin and taste them side by side. You’ll learn more about your own palate in one morning than a year of autopilot brewing. Here’s a quick origin cheat sheet to start matching flavors to beans:
| Coffee Bean Origin | Flavor Profile | Acidity | Body |
|---|---|---|---|
| Kenya | Bright and fruity | High | Light to medium |
| Colombia | Balanced, nutty, and fruity | Medium | Medium |
| Ethiopia | Floral and tea-like notes | High | Light |
| Brazil | Nutty and chocolatey | Low | Medium to full |
From Roast to Cup: Brewing It Right at Home
All that careful roasting can be undone in 30 seconds of sloppy brewing. Here’s how to honor the beans and pull a genuinely good cup of coffee at home.
Buy Fresh, and Check the Roast Date
Look for a roast date on the bag, not a “best by” date. Coffee hits its stride a few days after roasting (it needs time to off-gas) and tastes best in roughly the first three to four weeks. If the bag only shows a vague expiration date a year out, that’s a sign it’s been sitting around. Buy from a local roaster or a reputable online seller that prints the roast date.
Match the Grind to the Method
Grind size controls how fast water pulls flavor out. Too fine for your method and you over-extract (bitter); too coarse and you under-extract (sour, weak). This is exactly where the right coffee grinder earns its keep, since an even, adjustable grind is what makes consistent extraction possible. A rough guide for your coffee grounds:
- Coarse (sea salt): French press, cold brew.
- Medium (table salt): drip and pour-over.
- Fine (powdered sugar): espresso.
And grind right before you brew. Ground coffee goes stale within minutes as its surface area balloons.
Weigh Your Coffee (Yes, Really)
Eyeballing scoops is the number one reason home coffee is inconsistent. Use a set of coffee scales and aim for a ratio in the 1:15 to 1:17 range, that’s 1 gram of coffee for every 15 to 17 grams (milliliters) of water. In practice, about 60 grams of coffee per liter of water (roughly 2 tablespoons per 6 ounces) is a reliable starting point. Want it stronger or milder? Adjust the ratio a little at a time and take notes.
Nail the Water Temperature
Brew between 195°F and 205°F (90°C to 96°C). Boiling water (212°F) scorches the grounds and pulls out bitterness; water that’s too cool leaves you with a sour, flat cup. No thermometer? Bring water to a boil, then let it sit about 30 seconds off the heat and you’ll land right in the zone.
Pick a Method and Get to Know It
Drip, pour-over, French press, espresso, and AeroPress each pull different flavors from the same beans. Pour-over highlights clarity and brightness; French press gives you a heavier, fuller body. If you want a reliable everyday brewer, one of the best coffee makers takes the guesswork out of temperature and timing for you. No gear? You can still make great coffee without a coffee maker. Pick one method and get consistent with it before chasing the next.
Change One Thing at a Time
The fastest way to dial in your cup is to treat it like the roasters do: change one variable, taste, repeat. Too sour? Grind finer or bump the water temp. Too bitter? Grind coarser or back off the heat. Keep the rest steady so you actually know what fixed it. That’s the whole secret, no mysticism required.

Keep Your Beans Fresh (Don’t Waste the Roast)
You bought freshly roasted beans, now don’t let them die a slow death in a clear jar on the counter. Storing coffee well keeps the flavors the roaster worked for right up until you brew.
The Four Things That Kill Freshness
Coffee has four enemies, and they’re easy to remember: air, moisture, light, and heat. Every one of them speeds up staling. Beat them and your beans stay vibrant; ignore them and even great coffee goes flat in days.
Use the Right Container
Stash beans in an airtight, opaque container, ideally one with a one-way degassing valve that lets CO2 escape without letting oxygen in. One of the better coffee storage containers handles all of this for you. Ceramic, opaque glass, or stainless steel all work and won’t pick up odd flavors. The cute clear canister looks great and lets light wreck your coffee, so keep it for display, not storage. Keep your coffee storage in a cool, dark cupboard away from the stove.
Buy Whole Beans
Whole beans stay fresh far longer than pre-ground, because there’s less surface area exposed to oxygen. Grind only what you’re about to brew and you’ll taste the difference immediately. A decent burr grinder is the single best upgrade most home brewers can make.
Skip the Fridge
The fridge is a trap. It’s humid, and coffee acts like a sponge for both moisture and the smell of last night’s leftovers. Keep your everyday beans at room temperature in that cool, dark spot. (Long-term freezing in a truly airtight, single-use portion can work for beans you won’t touch for months, but for your daily bag, the counter cupboard wins, just not next to the oven.)
Drink It in Its Prime
Coffee peaks within a few weeks of roasting and slowly fades after. Aim to finish a bag within three to four weeks of the roast date for the fullest flavor. It won’t be dangerous after that, just duller.
Buy Smaller, Buy More Often
It’s tempting to grab the giant bag on sale, but stale coffee is no bargain. Buy what you’ll drink in a few weeks, then buy again. Fresh and frequent beats bulk and stale every single time.
Roast Meets Brew: Matching Your Method to the Beans
Roasting builds the flavor potential; brewing decides how much of it lands in your cup. Match the two and the whole thing clicks.
Let the Roast Guide Your Brew
Roast level should steer how you brew. Lighter roasts are denser and shine with a slightly finer grind and a touch more contact time to coax out their brightness. Darker roasts extract faster and turn bitter if you over-do it, so a hair coarser grind and a shorter contact time keep them balanced. When a cup tastes off, ask whether your method fits the roast before blaming the beans.
Grind Size, Again, Because It’s That Important
It bears repeating: grind size is the most powerful flavor dial in your kitchen. Finer for espresso, coarser for French press, medium for drip and pour-over. Adjust grind first when you’re chasing a better cup; it moves flavor more than almost anything else.
Water Quality Matters as Much as Temperature
Coffee is about 98 percent water, so bad water makes bad coffee, period. Use filtered water if your tap is hard, heavily chlorinated, or off-tasting. Keep the temperature in that 195°F to 205°F (90°C to 96°C) sweet spot to pull flavor from your coffee grounds without scorching them.
Dial In Your Brew Time
Contact time, how long water and grounds mingle, tunes strength and intensity. Rough targets: espresso runs 25 to 30 seconds, pour-over around 3 minutes, and French press about 4 minutes before you plunge. Shorter brews taste milder and brighter; longer ones taste bolder and can tip bitter. Adjust in small steps and taste as you go.
Make It Yours
There’s no single “correct” cup, only the one you love. The same skills the roaster uses (control your variables, taste, adjust) work just as well on your counter. Treat brewing as a quick daily experiment instead of a chore, and your average cup climbs fast.
Quick Answers: Coffee Roasting FAQ
The questions people actually ask, answered fast:
- Is dark roast stronger than light roast? Not in caffeine. By weight, light roast has a hair more. “Strong” usually means bolder flavor, which dark roast has, or a higher coffee-to-water ratio, which is on you.
- Why does my light-roast coffee taste sour? Usually under-extraction. Grind finer, brew a touch hotter, or extend the contact time.
- Why does my coffee taste bitter and ashy? Over-extraction or too dark a roast for your method. Grind coarser, cool the water slightly, or shorten the brew.
- How long after roasting should I wait to brew? Give beans about 3 to 7 days to off-gas, then enjoy them through the first month.
- Can I roast coffee at home? Yes, people use popcorn poppers, cast-iron pans, or dedicated home roasters. Just expect smoke and chaff, and roast in a ventilated space.
The Two Dials That Run the Whole Show
Strip away the romance and coffee roasting is two dials, temperature and time, working together to drive out moisture, fire up the Maillard reaction, and stop at exactly the right moment. Turn them one way and you get bright, fruity, tea-like light roasts. Turn them the other and you get bold, chocolatey, smoky dark roasts. Everything in between is fair game.
You don’t have to own a roaster to use any of this. Buy beans with a roast date, store them away from air and light, weigh your coffee, mind your water temperature, and change one variable at a time when something tastes off. Do that and your daily cup stops being a gamble and starts being a flavor you can dial in on purpose.
Now go put it to the test. Grab two roast levels of the same coffee, brew them side by side tomorrow morning, and taste the difference for yourself. Your palate is the only judge that matters, and it’s about to get a lot more opinionated. Happy roasting, and happier sipping.